Table of Contents
Armada 1 Single-Player Campaign
First a warning: If you have not played the campaign of Star Trek: Armada, yet, but intend to, do not continue to read this article. It spoilers a lot. You might want to read section Singleplayer Campaign of the Game Play article instead.
The Star Trek: Armada single-player campaign consists of four missions for each faction and another four missions for the Omega phase of the campaign, where you can have multiple faction's units.

The Omega group gives another four missions where you play different factions. It is not necessary to play the other factions in order to start a particular faction. The Omega missions on the other hand are unlocked only by the last Borg mission.
Federation Missions
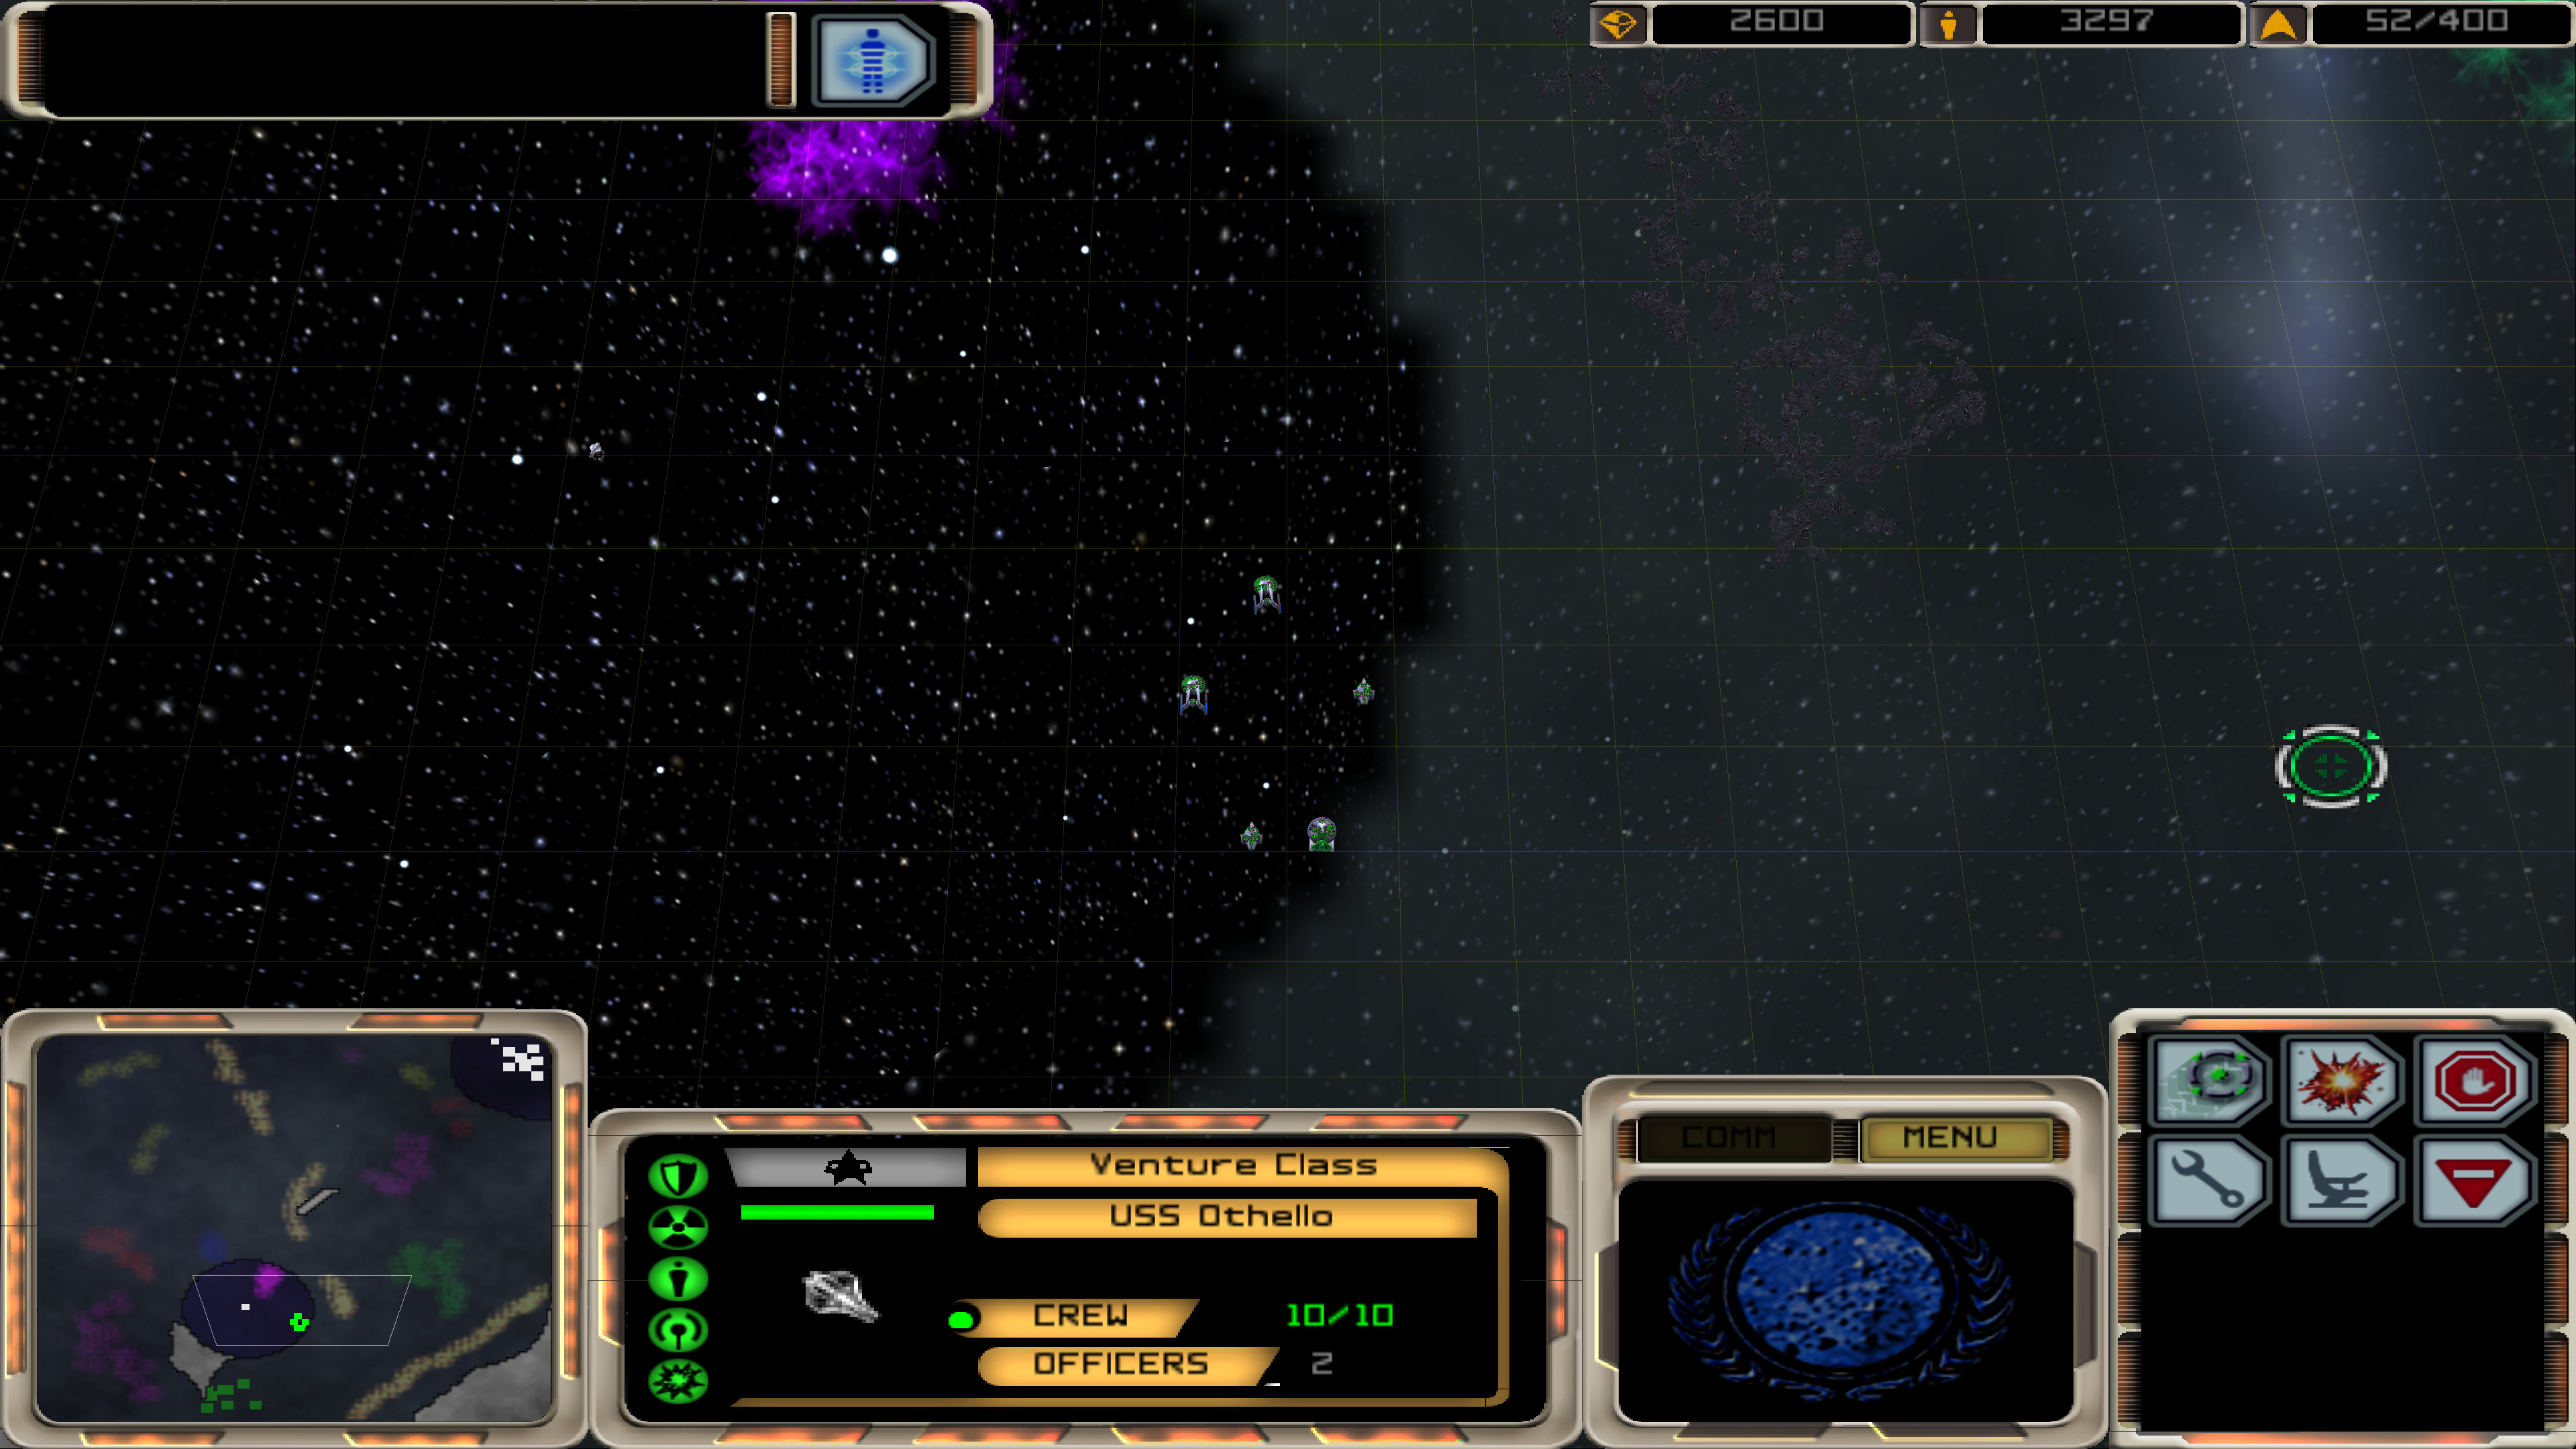
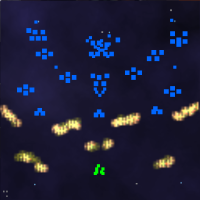
Premonitions
Tasks
You start with only a few ships which carry no special weapons, two Akira class ships, a Construction Ship and the Enterprise-E.
- Your initial job is to construct a Starbase and a Mining Station.
- Once finished, you will be attacked by Jem'Hadar destroyers. Your new objective will be to eliminate all of them.
- Once you have reached that goal, a pair of Spheres and a disabled USS Premonition will spawn in the upper right section of the map.
- After destroying them, the mission is concluded, starting the story if the campaign.
Story Line
The story begins roughly where Star Trek: Deep Space Nine left off. The Dominion has a peace treaty with the Federation but renegade Jem'Hadar units do not recognize it and attack your units. Once this thread is eliminated, the Borg arrive with a ship from the future, the USS Premonition, which captain Picard somehow recognizes, although it is not known according to the Federation database. After coming to its rescue, its Captain Demming reports from the future, where the Borg have already assimilated the better part of the alpha quadrant, including the Federation. He is trying to prevent that by giving an advanced warning.
Bugs
In the German translation the initial distress call of captain Demming is extremely loud (reaching overdrive levels), although the actual sound file is not louder than the rest. This suggests some sort of volume setting bug for this particular part of the mission script.
Also, saving the mission after the Premonition arrives and loading it will make its weapons and engines be restored. This Premonition, however does not have any Special Weapons.
Paradise Revisited
Tasks
You start with the USS Avenger (still without cloak), a Starbase, three Pulse Cannons, two Akira and two Venture class ships. Only the Avenger is equipped with its special weapon, the Anti-Matter Mines.
- Right from the beginning you will face one Son'a Battleship and two Son'a Destroyers attacking your base.
- After fending off your opponents, your new objectives is to build one Construction Ship.
- Once its construction is completed, another pair of Destroyers and another Battleship will approach your base and the next job is to build a Mining Station with your new Construction Ship.
- Upon completion, you are instructed to build a Shipyard. During that time another three destroyers and three battleships will arrive.
- The last task is to find the remeining six stragglers of the Son'a and destroy them. They consist of five destroyers and one battleship.
As a matter of fact the last part of the game can be won without even leaving ones base or building ships. Eventually all of the six ships will close in on you base. You also have Pulse Cannons available, so defending your base will suffice.
Story Line
This mission ties in with the events of Star Trek: Deep Space Nine and Star Trek: Insurrection.
Worf is entering the Baku system as ambassador for the Federation, trying to solve a not further defined problem there. Upon arrival the Son'a make it clear that they want to drive the Federation out of the sector and attack. The attack force and subsequently all stragglers are eliminated. After completing the mission objectives, admiral Horthorn contacts the Avenger, ordering them to travel to Qo'noS, lobbying for support against the impending Borg invasion.
Trivia
This mission is the only situation where you encounter the Son'a faction. There are no other missions or maps where this faction is present. However there is the Vendetta mission, where you can find a derelict Son'a Destroyer.
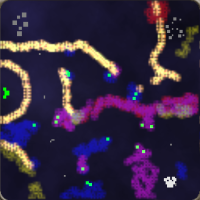
Vendetta
Tasks
You enter the new map with the Avenger. Your goal is to reach the final wormhole. Along the way you will encounter several events and objects to be tackled with:
- You start close to a marked wormhole, chased by two Birds of Prey and Toral's Negh'Var. Close in immediately to the wormhole and enter it. The attacking ships will follow you through it.
- Once you have reached the other side, try and go into the north east direction. Do not just sent them to the upper right corner, as the map obstacles will not allow for a direct path and your ship will will not move. Roughly at the center of the map you will encounter a red nebula.
- Approach it. If you get close enough the mission script will kick in and make the pursuers leave you alone.
- You will be instructed to destroy the derelict station in the middle of it. Once the station is gone, the passage is cleared of most of the nebula, so you can traverse it without getting destroyed. Beware: Not all parts, that show no visible nebula parts are actually save to remain at. So do not stay there, just go right through it to the other side.
- On the way to the next wormhole you will encounter a derelict Ferengi Marauder. You should take it. Beam over one boarding party (5 crew) and take it along with you.
- Enter the wormhole.
- You will encounter a Son'a Destroyer. Take it as well and proceed.
- You will encounter a derelict starbase, which you are instructed to take over. Take it and also the shipyard next to it. It is a good idea to man them both up to green status. It is however not necessary to re-crew them entirely. Green state is just fine, as it makes the stations repair the fastest already.
- You can now repair and recrew any ship coming into your possession. Do it.
- A short time after two waves of three Bird of Prey each will close in on your stations. Destroy them, or try to take them over.
- Once they are no threat any more, you can begin building Defiants.
- You are instructed to proceed to the next wormhole. On the way there you will encounter a derelict Vor'cha cruiser and later three opposing Bird of Prey. Take the Vor'cha.
- When having enough units, destroy the three Bird of Prey.
- The wormhole being marked as a target will lead to an enclosed section of the map, where three Bird of Prey and Toral's Negh'Var are already waiting, blocking your passage to the last wormhole (your goal).
- Destroy the Bird of Preys and send the Avenger through the last wormhole, once you can reach it. This concludes the mission. You can disable almost all subsystems of Toral's Negh'Var but not his engines. Also you are unable to destroy him. When the ship hits 0 crew it will simply be re-crewed by 10 crew.
- Toral will leave through the Wormhole you just entered the cavern from. He will vanish after this.
There are a number of derelict ships scattered across the map (not just the ones in plain sight of your path). It is a good idea to seek them out and make them part of your fleet. That alone gives you already a sizable fleet. When removing the derelict station inside the red nebula, there are two ways to go about it: Either simply destroy it, or even better, send over a boarding party of five and deconstruct it. This will give you an additional amount of Dilithium to spend on new ships. Also building new Defiants is a good idea. In combination with the recycling of the derelict station you will be able to create an overwhelming force easily.
Story Line
This mission continues the Worf-Toral-arc from Star Trek: The Next Generation. You start out with the Avenger in the Ikolis Expanse in order to use it as a short cut to Qo'NoS. Toral ambushes Worf, trying to kill him. As Worf is the only still living one of three people who knew the location of the original Sword of Kahless, his knowledge would threaten Toral's attempt to claim the leadership of the Klingon Empire with a fake Sword of Kahless. Worf tries to reach the other end of the Expanse, encountering various obstacles and opposing ships. After that, admiral Horthorn calls the Avenger, informing them of the Borg threat. As the Klingon Empire faces the possibility of a civil war, it would not be able to aide the Federation. Worf is given a field commission of Captain, to enable him solve this problem quickly. The mission closes with Worf seeking out the original Sword of Kahless, trying to bring it to chancellor Martok to call out Toral's sword as a fake, securing Martok's claim to the position of chancellor.
Bugs
This map is particularly difficult to traverse. Especially the radiation area of the map around of the derelict station is not clearly defined. When flying through this passage do not cloak your ships. They are very likely to get destroyed. Damage is dealt even when you are not actually touching the visible parts of the red cloud. Also other parts of the map in the upper quarter are notoriously preventing you from effectively ordering units to a specific point.
Some people report, that this mission may fail even when successfully reaching the final wormhole. Apparently some scripting requirements (destruction of the six Bird of Prey) are not met yet, so you lose the mission for vanishing first. So you better save the game before proceeding through it, just in case.
If you send other ships through the final wormhole than the Avenger they will vanish from the mission.
Dark Omens
Tasks
This mission is a mostly straight-forward search and destroy mission. You start with the Enterprise-E at your disposal, as well as a starbase, a shipyard and a Mining Station. You have the Venture, Defiant and Akira class ships and their special weapons at your disposal, once you built a Research Facility, too.
- Reactivate all the derelict ships scattered across the map.
- Destroy the Borg base.
In order to gather all the ships spread out on the map, implement kind of a snow-ball system: Collect the ships near your starting base by beaming in one(!) boarding party of five crew onto each ship. Re-crew and repair them and then send the Defiants and Ventures (they are the fastest) on their way to get the other ships, too. The Enterprise should help with that, too. In the beginning there is very little threat from the Borg, so you should be fine, as long as you act quickly.
Once having all the ships gathered, make sure to protect the Mining Station with them. In the beginning it is particularly vulnerable, as it has no defenses surrounding it. You may also want to change that. Also it will help to add a third Dilithium Freighter for maximum efficiency. Once done your income will be just enough to sustain continuous production on your yard. It is debatable if repairing the two freighters present at the beginning is preferable to just re-crewing them by beaming over from the Mining Station. Repair takes longer for the round trip to the yard and back, but the shields will be replenished. On the other hand, keeping them near the Mining Station and just beam over crew will give you an instant income, while having very low shields in the beginning.
The gathered Defiant class ships are useful in the beginning, but later on they are not powerful enough to resist the on-going waves of Borg attacks. You may want to deconstruct them during mid-game for their resources.
It is very much recommended to decommission the retrieved Nebula class ships, as their actual potential, their special weapons, are not available for the entire mission. This makes them basically only slow moving, weak ships. As crew is also at a premium in this mission, re-crewing makes little sense. The main use of them is the Dilithium they give when recycled. So do not send them for repair, when taken over. Just send them home into your base and deconstruct them, once you have re-crewed the other ships.
Do not approach the Borg base (located at the southern border of the map) too early. Two groups of Akiras should do the trick nicely, if you use their Chain Reaction Pulsar, when needed.
On easy you can however speed-run the mission by manning the ships in the immediate vicinity of the base while going for the Borg directly. They will not have built a whole lot of stuff, yet. The Enterprise' Corbomite Reflector and its high health level will be an asset here. You may lose some of the other ships, but if you time it right, the mission can be over within only a few minutes.
Story Line
This mission begins to actually proceed into the main story. The Borg have already attacked the starbase 612. The Enterprise-E supports it in rebuilding defenses and ships. Once finished with that, the Borg presence is destroyed, ending with admiral Horthorn ordering the Enterprise to escort the Premonition to the next shipyard for repairs. It strongly suggests a small homage to the often named but rarely depicted Battle at Wolf 359.
Bugs
The mission narrative states during the cinematics and later, that the mission is placed around the starbase 612. In fact the starbase placed on the map is named Starbase 312.
Also the game states, that you may not get the Starbase or the Enterprise-E destroyed. That's to be taken literally. Nobody will keep you from deconstructing both for their resources and starting off somewhere else… This will have two effects: The initial wave, the cinematics will warn you about, will not head to the Starbase, as the objective for that mission script step is no longer existing. The ships will stand still at their spawning location.
And also will it prevent you from losing the game by losing station or ship. They are no longer present, so cannot be destroyed. Also: If the Starbase or the Enterprise-E lose all their crew, the mission is not yet over. You can even deconstruct everything, and the mission is still on-going.
It's debatable whether this is intentional or not, but it looks like it actually is a bug/oversight: On the entire map there is only one Dilithium Moon, occupied by the player and in a good deal of distance to the Borg base. The Borg have no own Moon, yet they have a Processing Node in their base. So they have barely any income to speak of, if any. This will make them not have enough income to start many waves. After only a few of them, nothing will happen any more, as the AI has no resources to construct any further units.
There are reports of speed-runners, that when finishing the mission in under a certain (short) time, the Enterprise-E may be teleported half way across the map.
Klingon Missions
To the Gates of Sto'Vo'Kor
Tasks
This is a very basic kill-everything-mission. You start with Martok's Negh'Var, a construction ship, two Birds of Prey and five Vor'cha cruisers. Your stations are a starbase, seven Disruptor Cannons, three Sensor Arrays, a Dilithium Refinery and a freighter.
You can build a Weapons Center to research any item for the tier one ships, as well as a shipyard, that can produce these units.
- Destroy all Borg presence on the map.
- Preserve Martok's Negh'Var.
- Preserve the starbase given to you.
The Borg will not use any Detection Arrays or Detectors, so your cloak will help you a lot. Defend the Dilithium Refinery with some stationary defenses and Martok. His Ion Cannon is a real asset in this mission, especially against Cubes. Use two additional freighters. Use the provided Bird of Preys for scouting. They are faster than the Vor'chas but can also cloak. As long as you do not decloak, the Borg will not be able to do anything about them. Two to three groups of Vor'cha should be sufficient to crush any resistance.
This mission is a prime example for showing that the AI cheats in terms of visibility. As stated, in this mission the Borg are effectively blind to cloaked ships. But obviously that does not keep them from tracking you, as they will follow cloaked ships around. They cannot attack cloaked ships. But they are obviously aware of the location of your ships, even when there is no chance any ship or station might have them within scanning range.
Story Line
The Gamma Eridon sector of the Klingon Empire is under Borg Attack. Chancellor Martok is intervening. After holding out and driving them off by himself he requests an explanation why no support was sent to him. He signals the Federation that the sector is now free of Borg.
The Enemy Within
Tasks
This is a classic hold-out-mission, but it is not reinforcements that arrive, but the Avenger. You start with a starbase, two construction ships and 16 Sensor Arrays. You can research any weapon or ship, except for the Shockwave Station. On the map are already a bunch of units that will slowly approach your starting location.
- Martok's Base must not be destroyed.
- Once the Avenger arrives, it must be brought to Martok's base and must also not be destroyed.
- The Avenger must be brought to the Wormhole to escape.
Start by sending one Construction Ship to the lower left grey patch. Hidden by it is a second Dilithium Moon. Use it! You will need the resources. Build a Dilithium Refinery there, as well as at the moon next to your base. The 16 Sensor Arrays won't do you any good anyways. They will simply be destroyed one by one anyways. Deconstruct them right after mission start. That will give you an extra income of 4000 Dilithium. Build a third construction ship and use it to build a shipyard and a Weapons Center. Build two freighters for each moon and mine with them. Once you have finished all the installations, fortify your mining outpost and the main base. Torpedo Turret seem to be the way to go, as they deal the most damage. Placing them provides the highest damage density. For this use one Construction Ship at the Dilithium Refiniery to the south and two for your main base.
In order to get the Avenger to Martok's base relatively safely, send them through the radioactive nebula instead of going around. When trying the long way, it is likely you will encounter opposing ships, that have a good chance of destroying the Avenger, making you lose the mission. By going through the nebula you lose some crew, but that can easily be remedied by the shipyard you should have by the time the Avenger arrives.
Use the shipyard to build eight Vor'cha cruisers and research their Polaron Torpedo. The guarding four Negh'Var in the vicinity of the destination wormhole can be picked off in two waves, disabling each one of each pair with four Polaron Torpedos, killing them off one by one. After the first wave, wait a moment, until your special weapon energy is replenished, before attacking the last two ships. Once the passage is clear, send the Avenger through the wormhole.
Story Line
Toral confronts Martok at his base, intend on killing him. He sends his allied ships to finish the job. Martok is forced to hold out until Worf arrives with the Avenger, to continue to the High Council to defend his rightful position against Toral. They leave the sector through a wormhole, after repelling the onslaught or Toral's forces.
Bugs
Not actually a bug, but a peculiarity that is a consequence of the limitations of the game's engine: Whenever only one wormhole is placed, instead of a pair, trying to enter it will crash the game. For that reason there must be a second wormhole, besides the destination wormhole for the Avenger. The wormhole is not present right from the beginning but after reaching Martok's base with the Avenger. The second (not mentioned but fully working) wormhole end is in the lower left corner of the map, a position you might have already scouted, finding nothing there. You can use this end to finish the mission, too…
Some oversight in mission design is the player's ability to deconstruct Martok's base. While you are not allowed to get that starbase destroyed, you actually can deconstruct it for it's resources. But beware of doing this too early: If you to that before the Avenger arrives at the starbase, you cannot accomplish the mission objective to escort it to Martok's base, basically blocking you from finishing the entire mission, permanently. You would have to start over.
Also not necessarily a bug, but a means to ensure continuity: Toral's Negh'Var cannot be destroyed.
A Good Day to Die
Tasks
This mission is a classic destroy-everything mission. You start out with a Starbase, a Shipyard, a Dilithium Refinery, one Freighter, one Construction Ship, one Sensor Array and four Bird of Prey. You have the entirety of the Klingons arsenal at your research disposal.
- Destroy Toral's base.
- Do not let Martok's base get destroyed.
You start with a mining station way too far from the next Dilithium Moon. Build another one, either at first at the Dilithium Moon, or (if you can muster it) build it near the Infinite Dilithium Moon. In any case, make sure to take control of the infinite moon eventually. Once you have it, you have basically won. With these infinite resources you can fortify your own base, e.g. enclose the wormhole near to your own base with defense stations, to keep unwanted guests away. (The AI will use this wormhole a few times and it is protected from the other side by two Disruptor Cannons.) Or protect the mining operations with defenses.
In this mission you can build your own defense stations close enough to the Dilithium Moon next to Toral's base, that you can effectively prevent him from mining. As you can build whatever you want, you can go about this mission in various ways, e.g. also use Jach'eng ships to destroy the base.
You may notice one Negh'Var, that apparently you cannot destroy, the IKS Qetbogh. This is the ship, that will be used in the concluding cinematic, when Worf follows a Negh'Var while under cloak. So don't try to destroy this ship. Instead concentrate on the stations and other ships.
Story Line
This mission clearly refers to the episode Redemption II of the TV show Star Trek: The Next Generation. Martok suspects Toral to be once again aided by the Romulans. The mission plays in orbit or Qo'NoS, the Klingon home world. In order to uncover that alliance, he equips the Avenger with a Cloak to enable Worf to follow Toral without being detected. Once Toral's base has been destroyed, he leaves the scene, followed by the Avenger.
Bugs
Not necessarily a bug but an inconsistency: The mission objectives clearly state, that you are to destroy the entire base of Toral. But it is actually sufficient to destroy the main buildings. E.g. leaving the two Disruptor Cannons and the Sensor Array near the wormhole intact does not prevent you from concluding the mission successfully.
Grey Eminence
Tasks
This mission is (again) a simple destroy-everything-mission. You start with Martok's Negh'Var, two Construction Ships, two Bird of Prey, one Vor'cha. Again you have all research items available.
- Martok must survive.
- Destroy every opposing unit and station.
You are given two Bird of Prey. Use them to scout the map under cloak. In the early beginning the AI won't have Tachyon Detection Grids, so you are free to roam the map. Later on this will be much more difficult, once the AI can detect cloaked ships. But beware of the band of Cerulean Nebula. On auto-scout your BoP will eventually cross it, and decloak automatically.
Depending on the difficulty, the AI may use cloaks itself or not. On easy it won't. So research and use Tachyon Detection Grid accordingly. There are two Dilithium Moons in the vicinity of your starting location. One is close by, the other is roughly at the middle of the map, near the upper map border. Using the latter one is indicated but not necessary. If you do, make sure it is well defended (in the beginning by your ships, later by defense stations). The AI will tend to attack there.
Place the first Dilithium Refinery station immediately, and then the Starbase. In the beginning you will be more likely run out of Dilithium than of crew. While you are building your Starbase the Refinery can gather Dilithium already. (If you do not go for the second Moon right away, build the Starbase while you are building the Dilithium Refinery.) Place the Starbase a little to the left, so that you benefit from the planet-site bonus. Resources will not be a problem on the long run, as the map is having plenty of Moons. Once you have the Starbase, let it max out your moon(s) with Freighters.
Clear out any Romulan presence. Two groups of Negh'Var equipped with Ion Cannons will probably suffice. There is a Romulan Starbase in every quadrant, except for your starting quadrant. The lower right quadrant is protected by a line of defense turrets. If you scout right from the beginning, you will have mostly no problem with it. If you wait too long, you cannot cross it without being detected. When taking the lower left quadrant, try and capture the Romulan Shipyard. It can be a staging ground for the eventual attack on the Starbase in the upper left quadrant, helping you to repair your ships. As a side-effect taking it might scout out any remaining unscouted areas with Romulan stations, as these parts of the map are very likely revealed to you in the process.
Be aware: There is a Metaphasic Nebula on the left hand side around the Cerulean Nebula. It will attract ships crossing the Cerulean Nebula. That goes for your own ships as well as for the AI's forces. Keep that in mind while ordering your ships around in this part of the map. They may not got straight for a given target.
In the upper left corner you can find a Wormhole, that leads into the blocked section of the lower right corner, where another Dilithium Moon is located. If you are running out of Dilithium in the very late game, this is your last resort. But you should not need it, as there are a lot of other Moons to take from, first.
Story Line
The mission starts at the Romulan Neutral Zone, where Worf is still following the Negh'Var with the Avenger. He is lead into a Romulan base. This causes Martok to declare War on the Romulan Empire, as they are meddling into Klingon affairs of state. Until then he will not be able to aid the Federation against the Borg.
After the destruction of the Romulan presence, Martok states that the war has just begun. After the departure of the Klingon forces from the scene a Romulan Warbird decloaks.
Bugs
Not necessarily a bug, but in some instances the AI tends to gather some left-over units in the lower left corner of the map. If you are not aware of this strange behavior, you might end up looking desperately for that last unit on the map. If you cannot find for your life this last hidden unit, it is very likely, there is a bunch in the lower left corner.
Romulan Missions
Cloak and Dagger
Tasks
This starts out as a rescue operation but ends up in a destroy-everything-mission. You are given two Construction Ships, Sela's Warbird, two Griffin, two Raptors and one Shrike.
- Research Romulan Spy. You have to build the entire station build to reach that, first.
- Infiltrate the Prison Station with it.
- 10 Minute waiting time will be given, to prepare for the intended attack, once the forward Disruptor Cannons are down.
- After a while the Prison Barge arrives, intend on moving Oldan to another location. Take it over and get it to your base.
- New mission goal: Destroy every Klingon unit and station.
This mission starts as really sneaky. You are placed in the lower third of the map, in the middle. Start by building a Mining Facility and a Starbase. Proceed with the Shipyard and the Covert-Ops Facility. After that, research the Romulan Spy and use it on the two patrols, that are roaming the middle third of the map. Retreat for recharging the special weapons energy. Note: You can recharge the special weapons energy while inside a Cerulean Nebula. So you don't need to wander off very far for recharging.
Meanwhile also build an Advanced Shipyard and build a group of Warbirds. Research the Shield Inversion Beam. It will come in handy later. You may want to deconstruct the given Griffin and Raptors, as you will most likely not use them anyways. You can already proceed to infiltrate the Prison Station, once you have started the production of those Warbirds. The 10 Minutes preparation time are enough to get 8 Warbirds going. Once you have them, send them near the Prison Station under cloak.
During all this, try not to get caught by the Klingon patrols. Stay within the middle third of the lower part of the map when building stations or moving uncloaked units. If you build too far out (e.g. take the tempting offer of the third Dilithium Moon in the lower left corner), the patrols will spot you, alerting their home base. This would make your life a lot harder.
Once the 10 minutes have passed, the forward Disruptor Cannons guarding the entrance of the Klingons lair will be offline. Meaning, they will not fire upon you. The Prison Station will also not fire but the other turrets in the back will. Do not destroy the Prison Station. Destroy the other stations instead (especially the defenses). You will not have enough time to clear out everything around the Prison Station, before the Prison Barge and its escort arrive from the upper right corner of the Klingon base. Once it reaches the Prison Station, Dr. Oldan will be transferred to it and the mission objective changes to capturing the Prison Barge and bringing it to your base.
Do not actually try and capture the Prison Station, as you are initially told to. It will be a lot easier to just take the Prison Barge, as Romulan boarding parties are significantly weaker than Klingon ones. The amount of crew to be overcome on the barge will be a lot less than on the station. Make sure to not destroy the Prison Barge in the process or you will lose the mission.
Once you brought Oldan to your base, the mission objective will change again, stating to destroy all Klingon presence. Do it. But be prepared that the base's turrets will be active this time.
Story Line
Admiral Sela is intend on rescuing the captured Romulan scientist Dr. Oldan, which is working on the development of the Phoenix. In order to free him from Klingon captivity, she uses the aid of the Tal Shiar operative Tosan. After learning that he told the Klingons some not defined information, the entire Klingon presence is whiped out by the Romulans.
After this Tosan instructs Sela to proceed to meet Jal Par, to repay her debt and as part of an order by the Praetor (the Romulan head of state).
Call to Power
Tasks
This mission is a retrieval mission. You start out with a small base consisting of a Starbase, a Mining Facility, two Plasma Cannons. The ships you are provided from the start are Sela's Warbird, four Talon class scouts, one Freighter, one Raptor, one Griffin and two Shrikes. You can research and produce almost everything. Only the Phoenix Facility and the corresponding Phoenix are not available, yet.
- Hold out until the Containment Vessel arrives. Until then you are hinted to fortify your position.
- After a while the Ferengi will offer you to join jo for two filled Freighters of Dilithium. You are not required to do this, but it is the better choice.
- Shortly after the conclusion of this part of the mission, the Containment Vessel arrives. By that time your forces will probably not be strong enough to go through with getting the Omega particle. Expand them and then head out to get the particle.
- Shortly after you received your Containment Vessel, the Cardassians also set out to get the particle with their Containment Vessel. Stop them!
- During all this, Sela and your Starbase must survive. If you lose the Containment Vessel before grabbing the Omega particle, you will be handed a new one.
This mission can feel overwhelming, as the endless waves of Ferengi and Cardassians are invading your base. But if you do exactly what you are instructed, you should be able to hold out until you have a Shadow that will help you restore any shield damage taken during the attacks. Use Sela to drain shields of Ferengi Marauders and Cardassian ships and let your base defenses handle the rest. Do not forget to build two freighters for your own mining operations and keep some Dilithium for another two freighters for the Ferengi.
Use your Shrike's Romulan Spy to discover both factions station positions. Use your Talons to observe the strategically important parts of the map for incoming ships.
If sending the Freighters, then do not go the long way around it through the Cardassian controlled part of the map. Also do not try to send them through the Ferengi base to your west. Instead send them near the Metreon Gas Nebula so your south-west that separates the Ferengi part from your part of the map. Send the Freighters right through it. This short cut does not only save a lot of time. It also makes it far more likely for your Freighters to arrive, resp. takes a lot less effort to guard them.
Once you have the Ferengi support, things change considerably. The Marauders will also attack the Cardassian ships. So from that moment on you are basically facing only one opposing faction together with a friendly faction. When the Cardassians try to steal the Omega particle themselves, stop them. By the time this happens, you should already have a few Warbirds at your disposal.
You can either try and take the particle by fending off the Cardassians as you go, if they try to approach you. Or you clear out their bases first. In any case, destroy the three defense stations, that block passage to the Ferengi side of the map. And if you choose to destroy the Cardassian base, do not assume you are safe now. Additional Cardassian ships will still spawn, even with no stations left, that could produce them. So there is a residual danger to the Containment Vessel. Do not send it alone on its journey.
This mission can serve as prove, that the Cloak does indeed require special weapons energy. When the Cardassians use their energy drain on your cloaked Talons, at first nothing happens. But the instance their energy runs out, they will decloak for a short time.
Story Line
This mission simply continues the story them the last mission: Sela is ordered to retrieve the Omega particle from a Ferengi base. Arriving at the Devron system, she is received by Jal Par, telling her that the required Containment Vessel will arrive shortly. Depending on how the player decides, either the Romulan forces take the particle by force or peacefully. In any case, the Cardassian forces try to get their hands on it, too. The mission concludes with the Borg arriving to the sector after the particle has been brought to the players Starbase.
Trivia
- The orange faction making up the Western bases is actually Federation.
- The yellow faction (Cardassian) torpedo turrets are actually the same model as the Klingon torpedo turrets.
- The Ferengi yards allow for producing Dominion ships.
- The Cardassion yards only allow for repairing ships.
- This is the only mission where a faction joins your faction (when handing over the dilithium). (In Unholy Alliances you may provoke the Borg into attacking you by attacking them. But they will still also be enemies of the Klingon faction as well.)
Bugs
It is kinda odd, that the Omega Containment Vessel has the same voice-overs as the Phoenix. Sentences like »It looks like death will have to wait.« or »Our deaths may not be in vain« do not make a lot of sense for this unit.
The Gauntlet
Tasks
This mission is again an escape mission. You start with Sela's Warbird, two Shadows, two Warbirds, three Griffin and one Raptor. You will not be able to build any stations on your own.
- Bring the Containment Vessle and Sela to the marked spot on the map.
- Do not let Sela or the Containment Vessel get destroyed.
In this mission you will have to rely heavily on your special weapons. All of the given ships have a purpose. The Warbirds, including Sela's Warbird, will be the main damage dealers. Their Shield Inversion Beam will be an asset against Cubes. The Griffin are supporting and helping by blinding the opposing forces with the Sensor Jammer. You may not need that at all. The Raptor can be your best chance for survival, as its Myotronic Inhibitor makes attacking forces temporarily unable to use their weapons. Especially against Cubes that can be very necessary, as them assimilating the Containment Vessel will make you lose the mission. The Shadow class ships are there to mainly heal you but also to throw attacking groups of ships into chaos with their Holo-Emitter. Your main problems will be keeping the units with different speed together and reacting fast enough against any upcoming threat. This time the path to your target will be traversable all the way, so sending your convoy straight to the circled area will work. During the entire mission an endless stream of Borg ships will come and catch up from behind. Every new Cube will be announced by the Borg themselves, that state their usual greeting. So watch your back.
At the early beginning you are attacked by three Interceptors. They pose little threat. After destroying them, you will face several sub tasks. First you are to destroy a Klingon Dilithium Refinery. Go to the designated position with your cloakable ships. Destroy the surrounding ships first. When attacking the actual station. Try to capture it. You may not need the resources from their deconstruction (do that immediately or you will be discovered) but you may get a good look ahead from all the temporarily visible Klingon stations. Cloak after destroying or capturing the station and return to your convoy. Once the Klingons arrive at the site of your attack you are safe to proceed.
Further you will encounter one Imperial Shipyard and two Klingon Shipyards. Try to take over at least one of them. They can come in handy when building more ships. The Imperial Shipyard is to be prefered, as it builds the more powerful ship(s). Build some Negh'Var from it, to increase the strength of your armada. You may now take over the Weapons Center. Try not to destroy its research pods. Setting your ships to Yellow Alert and specifically aiming at the main station should help with that. Beaming in the moment the shields fall may give you this station and all of its research. The Negh'Vars you just built may now have some new Ion Cannons.
When proceeding further, an ambush near a Black Hole is waiting. A Fek'lhr, one Negh'Var, one Vor'cha and one Bird of Prey are sitting next to the black hole. Do not approach uncloaked. The Fek'lhr positioned there may use its Repulsion Wave on one of your ships and send it into that black hole. If it is the wrong one, e.g. Sela or the Containment Vessel, then your mission fails. Better try and attack from behind. Use your cloakable ships and get it done.
After that incident Sela states, that you might get a shortcut, if you find out what the pattern of the wormholes ahead is. They are switching their connections. (There seems to be no discernible pattern, but you may try.) The actually easier way for you is to simply destroy the three Vor'cha cruisers, that are waiting further ahead. Even if you sustain some damage, you can always go back to the yards you captured, to repair your ships. The last section of the mission and map is a rather large area with almost no objects. There are one Vor'cha, one Fek'lhr, one SuQ'jagh and one Negh'Var patrolling back and forth. They should not be a problem now. Proceed to the destination.
Note: The waves of attacking ships will get stronger and strong. So do not take too much time to finish this mission.
Story Line
Sela enters the Kelrabi system, pursued by the Borg, facing the prospect of running into the local Klingon forces. After some run-ins with Borg and Klingon alike, destroying some Klingon installations along the way, as well as several Borg vessels that caught up, the convoy reaches Jal Par, who holds off the Borg while Sela and the Containment Vessel are escaping.
Trivia
The Warbird receiving the Omega particle at the end of the mission cannot be destroyed.
Unholy Alliances
Tasks
This is basically a triangle destroy everything mission. Up to the point where the Klingons are destroyed, the Borg and the Romulan are in league. After that they fight each other. You have the entire Romulan arsenal at your disposal for this mission. You start out with Sela's Warbird, two Romulan Construction Ships, two Talon scouts and two Griffin cruisers.
- The initial task is to destroy the Klingon faction.
- Once that is achieved, the Borg must be destroyed.
- Sela must not be destroyed.
This mission may turn both ways, the Borg being decimated or the Klingons. Who will get the upper hand is not predetermined. So keep an eye on the progress of those two.
The Klingons will attack you rather early. Also the Jach'eng attack wave will come relatively soon. You are under a tight schedule on this mission. Keep the initial ships, as they will be the only thing besides your build stations, that will help you defend against the initial Klingon attack. Once you have the Advanced Shipyard producing the first Warbirds, you may consider recycling them. When the Jach'eng ships arrive at the scene, try and capture at least one. They will help you considerably, when deployed against the Klingons or Borg. Also do try and scout early on with your Talons. In the beginning the Klingons are unable to uncover you. Later on you will not be able to sneak into their base that easily.
If you are at risk of running out of resources (usually that will not be the case, you start at a position with two Dilithium Moons) you can find another Moon in the upper right corner.
Do not rush the destruction of the Klingons too much. Once they are gone, you will immediately face the Borg as opponent. You might want to prepare for that by »mining« their base: While being allied with you, they will not keep you from building a lot of defense turrets in their base (but do not attack them, as this will break your alliance prematurely). The instance your alliance is broken up, your turrets will start shelling the Borg stations. Also a bunch of additional Romulan ships will appear in that instance.
Note: Attacking the Borg with conventional weapons will make them turn on you as well. So refrain from doing so. Exception: The Jach'eng and Phoenix ships can still damage them considerably without them turning on you. But before having the Klingons decimated enough for them tho be no thread it is not advisable to start with that.
Story Line
Sela is entering the Narendra system, obviously expecting the Borg there. She negotiates with them, offering to give the Omega particle to them, in exchange for them destroying the forces of the house of Duras in the system (destroying the evidence for the Romulan involvement in Torals attempt to cease power).
Toral learns of this and in turn attacks Sela's base. Some time after the Borg demand the Omega particle to be handed over to them, which Sela refuses with reference to their agreement. Toral's forces must be eliminated first. Shortly after that three Jach'eng ships are dispatched to destroy the Borg. Sela prevents the deployment.
Once the Klingon presence is gone, Sela reveals that she never intended to hand it over to the Borg, destroying their remaining forces. After the destruction of the Borg, the ways for a peace treaty with the Klingons is open.
Borg Missions
Resurrection

Tasks
This is a two-part mission, with a capturing task and to obligatory kill-everything-objective. You start with two Assembler, one Sphere and three Assimilators. You can build and research any item the Borg have at their disposal.
- Capture the Dominion Cloning Facility.
- Send a Cube to the taken over Cloning Facility.
- Do not let the Facility get destroyed.
- Eliminate all Dominion presence on the map.
In this mission you will have to learn to consider the specific traits of the Borg. Borg have a rather heavy demand on the crew income. Use a combination of Assimilators for Crew gathering and the Crew for building Cubes. Also build a second Nexus to provide your economy with the crew that your basic load requires. To afford all this, use both Dilithium Moons near your starting location. It happens very often, that the Dominion attacks rather early on (before your Assembly Matrix is finished) with a lot of their Destroyers. That can become a problem. If push comes to shove, use the Metaphasic Nebula in the upper left corner of the map, to restore chipped ships. Also adding defense turrets around your mining operation is certainly not a bad idea.
Destroy whatever comes your way, or capture and recycle it. There are a number of Dominion units scattered around the map and waves of newly build ships will attack every now and then. Borg are strong offensive-wise. But the Jem'Hadar Destroyers are not to be taken too lightly, as their Polaron Torpedo can rig havoc on your ships. So head out in groups, never alone. Try an attrition-like strategy to wear their bases defenses down. Especially beware of the defenses around the final target (the Cloning Facility). In combination with the large number of ships produced by the three Dominion Shipyards this is a strong defense. See to it, that you do not accidentally destroy the Cloning Facility during the onslaught.
Once you take over the Cloning Facility, new Jem'Hadar units will spawn. Some will head to your base (you have them defenses in place, right?), some will head for the Cloning Facility. Do not let them destroy it. You will have to hold out for a while, until Locutus has arrived. Once he has, send a Cube to the Cloning Facility and destroy any stragglers afterwards.
Story
The Borg call the mission Action 420 in sector 303. A local Dominion Cloning Facility is to be used as a means to resurrect Locutus. This mission clearly references the two-parter The Best of Both Worlds of Star Trek: The Next Generation. Locutus is seen as an independent mind, that is supposed to help the Borg acquire the Omega Particle.
Bugs
Rather early on a single Jem'Hadar Battleship will enter the Radioactive Nebula in the lower right direction of your starting location. It will stay there until all of its crew is gone. This makes it very easy to capture. Just make sure you do not run into Jem'Hadar patrols, when salvaging it. Take your time, it won't go anywhere. The AI will not try to retrieve or attack it, until you captured it.
This is obviously not an intended part of the story line, so it has to be consider a scripting bug.
Also, when saving the mission and loading it, there is a good chance the background will change from the normal looks to Borg background.
Assimilation
Tasks
This is an assault mission where you start with no Dilithium Moon of your own. You have all research available. Your starting units are Locutus' Cube, one Assembler, one Interceptor and two Assimilators.
- Assimilate all ships in the sector.
- Capture the Romulan starbase.
- Locutus must survive.
- If by the time you take the starbase, Romulan units or stations are left, assimilate or destroy them as well.
This mission shows particularly well, that the Borg of Star Trek: Armada are actually scavengers. You start out with barely enough resources to build one Nexus and one Assembly Matrix. As there is no Dilithium Moon in the vicinity, you depend on assimilating ships and stations. Locutus' Cube is the only unit, that can do that efficiently in the beginning. Assimilate and recycle enough ships to build up a suitable base. As assimilation is costly in terms of crew you will want to build a second Nexus as soon as you have the Dilithium for it. Build both Nexus (the one you start the mission with, and the consecutive one) on top of the blue planet to make use of its income bonus on crew. You will need it.
Assimilators with Auto-Assimilator researched may help out with gathering additional crew in the beginning. Later on you will not have to rely on them any more and can even recycle the Auto-Assimilator item and your Assimilator ships. As you are supposed to assimilate the Romulan starbase, you will have to switch to Cubes at some point anyways. Research the Holding Beam before building your first Cube. Without it, the Cubes have little use in this mission, as you are not meant to destroy everything but make it your own (and recycle whatever you don't need).
There are a number of ships and stations on the map, that you can take. Despite the mission objectives implying something else, this is actually optional. Capturing the starbase and neutralizing all Romulan presence will suffice. In the upper right corner there is also a Dilithium Moon and a Dilithium Refinery plus the corresponding Klingon Dilithium Freighter. You might want to take those. In general you might want to first clear out »your« part of the map, before heading through the wormhole. There is plenty of resources out there for the taking.
During the entire mission Romulan ships will come from the wormhole connecting you to your target. Assimilate whatever you can of them. All of them will eventually come for your base. Some of them will do that directly. Some of them might pass you at first. If you miss a bunch, they will go to the north but soon they will return for you base. In order to get some map control, place at least one Detection Array at a suitable location to oversee all ships coming from the wormhole. Just don't place it right in front of the nebula clearing, as it will get destroyed rather soon otherwise.
Researching the Tachyon Detection Grid may also be useful. You will not, however need it when playing the mission on easy difficulty. Make sure you get an ahead warning before ships are approaching your base, as rebuilding facilities is rather expensive on this mission. You may also want to place a cloaked ship near the wormhole, once you have one. You may also want to fortify your Detection Arrays as the AI tends to kill them off. Same goes for your Modification Center. The Holding Beam is very important in this mission. So make sure you are not caught with your pants down, just because the AI kills your Holding Beam pod at your research station.
As Romulans are particularly weak in terms of boarding parties and the Borg on the other hand are the strongest with that regard, you are heavily favored in this mission. So the lack of Dilithium in the beginning is not a real issue. Crew, however may very well be. A few things you should consider: Shadows are very expensive but have very little offensive value for you. As you have no access to their special weapons, they have more worth to you as a Dilithium source than as actual units. Whenever you can, grab those. They are slow so you should not have any trouble keeping up with them.
Warbirds are also rather expensive, but have strong offensive capabilities. But in comparison to your Cubes they are not too powerful. So you might also want to recycle those as well or use them as a destroying force. But be on your guard: The AI will use their Self-Destruct capability quite frequently for those ships that were spawned by the mission script (unlike the ones actually constructed by the AI). In order to prevent them form blowing up, immediately cloak a newly taken over Warbird. That turns off the Self-Destruct at the same time it turns off all other weapon systems. Also send one cloaked ship to the other side of the wormhole. The AI has no detection there, so you are safe to scout out their entire base. A captured Shrike will be the most cheap unit, so they are cut out for this task.
You can make your live a little more interesting here, as there is a Federation Starbase present on this map. When capturing it, you have the entire Federation techtree at your disposal, too. The Temporal Research station can come in quite handy, when entering the wormhole, as almost surely there will be a bunch of ships waiting for you, in addition of the already present defense platforms. Just wait a moment after freezing the other side of the wormhole. Many of theses ships may slip through the wormhole the moment you use the Temporal Stasis Field on them. This way you also see to it, that noone escapes your attack. Otherwise you might end up with a few stragglers roaming your side of the map.
You might want to also take over the Romulan Shipyard between the actual base and the wormhole for repairing your units. This can give you a staging ground for your last assault.
Story Line
The Borg have gathered information from Jal Par by assimilating him. This leads them into the Nelvana system, where the Romulans have a base on the other side of a wormhole, keeping the Omega particle. The Borg start out with little resources but assimilate the present ships in the sector. After gathering enough forces they take over the starbase and with it the Omega particle. They learn also that the Federation is sending out an ambassador to mediate between the Romulans and Klingons. As such an alliance would pose a significant threat, a Cube is sent out to assimilate the ambassador's ship. Locutus will proceed to sector 001 (Earth).
Trivia
This mission includes the highest number of factions, three of which are not playable. This is the only time (in an unmodded Armada installation) when the player will encounter the Breen faction. The Jem'Hadar and Ferengi are not actually playable but apprear in other missions as well. The other four playable factions are all present.
Bugs
Not exactly a bug tied to this mission, but one that happens particularly often on this mission: By definition the Temporal Stasis Field is meant to freeze all units not of your team. That means you are unable to give them any order, as long as they are frozen in time. But somehow the AI is capable of sending a fraction of its ships through the wormhole after you freeze the Romulan end of the wormhole. It should actually not be possible to do this, but the AI manages to do this anyways. Only drawback: The units themselves are still frozen, meaning they cannot use their weapons or maneuver. So you can still pick them up one by one. This is why it makes sense, to freeze the Romulan side of the wormhole, wait a moment (until the units pour through) and then destroy any ship that came through.
A minor mission script bug allows for the mission still not to fail when Locutus' Cube becomes uncrewed (derelict). So the only way to lose this mission is to get Locutus' Cube to be actually destroyed or taken over by the AI.
Extermination
Tasks
This is a destroy-everything-mission. You have the entire techtree of the Borg at your disposal and start out with Locutus' Cube, one Cube, one Assimilator, one Diamond and two Assembler.
- Destroy the Species 9341 units and stations.
- Build a Transwarp Gate
This mission is less difficult than annoying. You start out with 5000 Dilithium and a handful of units. You will be under rather constant attack by Species 9341 Entities. They cannot harm you directly by damaging your ships or stations but they attack by reducing crew. On the long run this might become a problem if you don't see to having enough crew income. The 5000 Dilithium and the 20'000 Dilithium from the Dilithium Moon near your starting location should be enough to build the entire techtree with 2-3 Nexus.
Do not go for the Transwarp Gate right-away. Better equip your base with a few Torpedo Turrets first and once you have enough ships, destroy the Mother Entities. They are the source of the Entities and produce them at a rather high rate. So until you get rid of them, you will face a more or less constant attack. In contrast to Nexus, defense platforms require no crew and will be constantly at 100% efficiency. Your Nexus will eventually drop to yellow and then to red crew levels, which makes Borg fire only a fifth of the normal firing rate. You cannot hope to get rid of the number of units you will face with that firing rate. So better use unmanned stations to defend yourself.
As the weaker units are not really useful in this mission and Species 9341 does not have any crew, the Assimilator should better be dismantled. You might think of also going for the second Dilithium Moon, but you actually have enough resources at hand from that one moon. One base is considerably easier to defend, than two outposts on the map. If you run out of dilithium for the transwarp gate, simply recycle your torpedo turrets (once you have made sure no opponent units remain or course). As losing units on this mission is not too likely, you should basically have all the material you need.
Entities are rather sturdy (400 Shield Energy). As they come in quite a number and have a high recharge rate of their special weapons energy, you will lose crew quite a lot. Each attack with the Psychonic Blast removes only 2% of the crew, but as the reload time of the special weapons energy of the Entity is so low, it will do that a lot. The best you can do is trying to keep your Nexus' at yellow crew level, until you have some basic torpedo defenses as support. After that it is OK to get into red, as the turrets will take care of the Entities. This will be the time to get either more Cubes or more Diamonds. A group of eight should suffice. When using Diamonds, research the Ultritium Burst. The Holding Beam for the Cube on the other hand is pretty useless in this mission. In general you will not have to research anything except for Ultritium, if using it. But use only the Cube or Diamond, as they are the most efficient damage dealers in this mission. Whatever you decide, recycle the other unit type you got in the beginning.
Once you have your eight Cubes or Diamonds, head out to destroy the Mother Entities. You can scout ahead with a Detector. As they have very little crews, the drain by the Entities attacks is not really great. You should still have enough crew to come home, by the time you have scouted out all four Mother Entities. When attacking, focus on the Mother Entities first. They produce new Entities within only a few seconds. So removing the constant supply of units is paramount. Once the Mother is gone, you can see to the destruction of the remaining Entities in the vicinity and then go home for recrewing. When having destroyed all of them, begin constructing the Transwarp Gate.
Your ships and stations will lose a lot of crew. The good thing is, once you are in the red range, you will lose it at a considerably lower rate then initially. But make sure to not let Locutus get drained entirely. This is pretty much the only thing your opponent can do to achieve victory. So keep an eye on him. But that does not mean that you have to keep him at your home base. Make him part of the attack force.
In general, as was stated, this mission is rather annoying as you are constantly under attack. This is more a test of endurance than it is actually difficult. If you are easily stressed by constant attacks, this can be draining. But it is actually not that easy to lose this mission, even on hard difficulty. Don't get too scared of low crew. It will be common in the first two thirds of the mission. But seeing to enough crew income to recover is key. At least two, better three Nexus in combination with intelligent re-crewing of Nexus and building ships, that's what will bring you victory.
And if you need an easy victory, simply don't build any Nexus (at first). This does make the AI not build any Entities and not attack you. You can then go about the mission one base at a time. Just make sure to attack Entities directed. If you let your units choose their targets themselves, it will take longer. You can also build a Processing Node without any fear of attacks. This way, if by any chance you run out of crew during your attacks (reduces firing rate considerably when you drop to condition red), you can replenish your ships with crew taken from the Processing Node.
Story Line
The Borg intend to transport the Omega particle to sector 001 (Earth). The Plejadus Cluster is chosen as a location for the required Transwarp Gate. As the area is inhabited by the hostile Species 9341, which cannot be assimilated, there is only one course of action: Destroy them all (hence the name of the mission). Once this is done, the Transwarp Gate is used to get to Earth for the final assault. As the Vulcan Ambassador was intercepted and assimilated by the Borg already, Romulan or Klingon aid will not arrive.
Bugs
The Mother Entity will never attack you in any way. But actually it does have its own defense capability in form of a derivative of the Ion Cannon, named Plasma Ball. The only problem with that is: While this weapon requires 600 special weapon energy, the Mother has an upper limit of special weapon energy of only 500. So it can never fire this weapon and is therefore defenseless. This is also the reason why this mission is hard to fail, as it is very unlikely, that you lose Locutus to the crew drain. Nothing on this map can actually inflict direct damage to the Borg ships.
Another peculiarity comes into play, if you consider the triggering system of the game. If you avoid building a Nexus in this mission, the Entities will not start producing units or heading out to attack you. So you can clear out base after base with little danger.
More a mislabelling than a bug is the fact that the species 9341 are labeld as federation faction. You can also experience this in more detail, when expliting the reversed roles bug. Then the vioce-over responses of the units are also federation voice-overs.
The Twilight Hour
Tasks
This is again a classic destroy-everything-mission. In this case you may also assimilate whatever comes your way (except the Enterprise-E and the Avenger, see section Bugs below). You have the entire technology of the Borg at your disposal and start out with two Assembler, Locutus' Cube, one Diamond, one Interceptor, one Sphere and one Assimilator. Basically you have every ship except for a Detector and a Dilithium Collector.
- Destroy all opposing forces (or assimilate them).
- Keep Locutus alive.
You start out in the lower middle of the map. In both directions, left and right, you will find one Dilithium Moon. It is probably best to take both at once. Place a Processing Node at each, and a Nexus. It makes the most sense to place the Nexus first at the one side and the Processing Node first at the other side. This way you will have the capability to produce Dilithium Collectors as soon as possible. Hurry. You will be attacked rather early and already with a Temporal Stasis Field. This is also precisely the reason you should not place Locutus inside the base. Keep him a bit away from it. Otherwise you risk him being frozen in time and subsequently destroyed (=losing the mission). Similarly keep the other ships capable of attacking away from the Nexus. This way you can come to its rescue right after the Stasis Field is cast.
In general you will be hit by the Stasis Field a lot. The opponent has both, a Temporal Research station and the Premonition. Especially the latter has a rather fast recharge rate for its special weapon energy. So it is best to use two groups, one that runs the risk of being frozen, and one, that keeps its distance from group one, and attacks the moment that happens. Otherwise you will lose a lot more ships for being defenseless during the Stasis effect. This way you can easily get rid of the forward positions, that are between your side and your opponents side of the map. Assimilate one station, that has crew, to see all positions. That way you can devise a proper attack plan to counter the Stasis Field attacks. Once you have the Premonition and the Temporal Research out of the way, the mission turns into a piece of cake. You can then apply blunt force…
If you intend using the Holding Beam in this mission, you better place two Modification Centers on the map, one in each of your bases. Research the Holding Beam in both. The AI has a tendency of going for that pod, meaning you might find your self without the Holding Beam all of a sudden, because it got destroyed. If you have a backup, that should not happen (unless you miss the fact, that the first one is already gone).
Do not use Torpedo Turrets. The Sovereigns will eat them for lunch with their Corbomite Reflector. Better use Energy Cannons.
Story Line
Locutus has arrived in sector 001 to assimilate Earth and starts with destroying the shipyards at Utopia Planitia. Picard aboard the Enterprise-E confronts him. Locutus states, that Picards assumption, that the Klingons and Romulans will not come to his aid as ambassador Spock was assimilated before he had a chance for mediating between them. The Premonition and the Avenger are also present. During the onslaught, the Avenger gets destroyed, the Premonition gets destroyed (or assimilated) as well, while the Enterprise manages to escape through a Temporal Gate. Three days later Earth is assimilated.
Bugs
Less a bug, more of a peculiarity that comes from the game engines mechanics and the scripting technology used: As the Enterprise-E does have a special role in this mission (it has its own cinematic when leaving the battle field), you cannot actually assimilate it. When trying to use the Holding Beam on it, it will work up to the point, where the Enterprise has only 5 crew men left. After that, you beam over and over, but nothing happens. That's because the script requires the ship so be part of its original faction. Instead try and destroy it, once its Corbomite Reflector drops. It will not get destroyed but said cinematic is triggered. A very similar thing goes for the Avenger. It also has its own cinematic, but it does get destroyed. You cannot assimilate it. The Premonition on the other hand can be assimilated, but only later. As the Premonition is supposed to open the Temporal Gate, through which the Enterprise will escape, it has to survive until the Enterprise has left the site. Therefore you cannot assimilate it either, until the Enterprise is gone.
Omega Missions
Once and Again
Tasks
This is another convoy mission. You start out with four Defiant, two Akira, two Nebula, the Enterprise-E and the Galaxy carrying ambassador Spock. Later you will be given a Starbase and two Warbirds as well.
- Bring Spock (the Galaxy class ship) to the Romulan Starbase.
- Spock must survive.
- The Enterprise must survive.
- Destroy all remaining Borg, once you've reached the Starbase.
This mission is fairly simply if you take your time. All of the ships in this mission have (or will have) their special weapons. Use them! The Nebulas are good for repairing damaged ships. The Enterprise can take the brunt of conventional weapons fire. The Akiras and Defiants can deal some damage, but are mostly to keep the Borg way from the Galaxy. The biggest problem will be keeping your convoy together as there are all three kinds of ship speeds within your group. Using the special weapons also requires you to be on your toes.
Borg will come out of nebulae and Transwarp Conduits. Their primary target will be the Galaxy class ship, so keep an eye on it at any given time. The Cubes and the Diamonds will be the greatest threats in this mission, due to their Holding Beam and Computer Override ability. The latter is not a problem by itself but when your own ships start firing on a Borg-controlled Spock or the Enterprise, you may end up losing the mission anyways by destroying them yourself…
You can traverse the entire map without obstacles to your destination, so sending your ships to the spot marked on the map will always give you the right direction. But do not go there in this fashion, as your convoy will be spread out a lot, making it rather difficult to defend. Use control groups to manage your differently fast ships. When a Transwarp Gate opens near you, do not enter it (you will lose entering ships).
When entering one of these Transwarp Conduits with Spock's Galaxy while they are active (scripting sends reinforcements), a special cut-scene is played, where you end up on the other side, but being destroyed instantly (losing the mission in the process). Instead converge near it. This way you can ambush the emerging ships, dealing a lot of damage while they are defenseless when exiting the Transwarp Conduit.
Once you have reached the Starbase, you will be instructed to destroy the remaining Borg. Also Transwarp Gates will continue to open near the Starbase. So be on your guard. You can either seek the Borg out or wait for them to come to you. Use the given Warbirds for scouting and also attacking. As you can use your also newly given Starbase to build a Construction Ship, go for it and build a Shipyard with it. This will allow you to recrew and repair your ships and will still leave some Dilithium for backward fortifications (where most of the Transwarp activity will be at). In the upper right corner you will find a bunch of derelict ships. Man and cloak them and get them repaired.
Story Line
The Enterprise-E is sent back in time from the battle in Earth orbit by the Premonition to warn ambassador Spock's convoy of the threat of the Borg coming for them. The Enterprise escorts the convoy to the Romulan Starbase, where peace talks are scheduled. After destroying all remaining pursuers, the peace negotiations between Martok, Sela and Picard begin.
A Line in the Sand
Tasks
This is a hold out and a destroy-everything mission. At first you are instructed to hold out until support arrives. Once it did, you are to destroy the Borg presence. You are given numerous ships and a lot of stations. You have the entirety of the Federation techtree available. Once the Enterprise-E returns, it will have Martok's Negh'Var, Sela's Warbird, two Negh'Var, two Warbirds, a Fek'lhr, a Shadow, a Vor'cha, a Griffin and one SuQ'jagh with it.
- Hold out until the Enterprise arrives.
- The Avenger must survive.
- The Premonition must survive.
- Sela must survive.
- Martok must survive.
- Picard must survive.
- Destroy all Borg presence.
This mission is kind of the re-match of The Twilight Hour, this time played from the perspective of the Federation. You start out with a few forward defense stations, that are merely enough to stall a bit for time. Right when you begin, use the Temporal Stasis Field of the Premonition and the Temporal Research station on the approaching Cubes, once they are in firing range of your stations. That will keep the damage dealt to you lower (but won't help you to get to all three attack scenes in time, so a few Borg will break through). In general, those two objects are you single most advantage, as you can freeze attackers, if the situation gets to hot.
Once the attack is over, see to it, that all three Dilithium Moons get another two Dilithium Freighters each. Build the Constructors right after you finished building the Freighters. Secure your Dilithium Moons first, with Torpedo Turrets. Do not rely only on forward defenses. The Borg have two Transwarp Gates and will use them a lot in the beginning. Continue to defend routes the Borg use when attacking. Cloak the Avenger and place it somewhere out of the line of fire. It will not add much to the fight, but if it gets destroyed, you will lose the mission. So do not take any chances.
Start research on those special weapons you intend to use. The Federation Repair Team, the Shield Disruptor and the Corbomite Reflector should be of particular use. The Nebulas are good as enhancing defenses with their Shield Disruptor (making the attackers a lot more vulnerable) and the Repair Team (undoing damage dealt by the attackers). The Sovereign is probably the unit of choice to retaliate and intercept. In combination with the Temporal Stasis Field you will be able to destroy the stations of the Borg step by step. This will probably begin after your support arrived.
Once it did, you will have more cloakable ships at your disposal. Also all their special weapons are available. Use cloaked ships to scout out the Borg part of the map. As the Borg will not have the Tachyon Detection Grid, you are rather free to roam the map. The Shadow may help restoring damaged stations.
Locutus cannot be destroyed. Once he is on the verge of being destroyed he will retreat through a transwarp conduit (that you cannot enter).
Story Line
You start out at Earth, with its defense fleet. The Enterprise-E meets its future self, being instructed to travel back in time, to do, what they did: See to it, that Spock arrives at the peace conference, therefore closing the time loop. The Premonition sends them there. The remaining Enterprise heads out to meet the Romulan and Klingon Forces. In the meantime the Borg attacks are repelled by the defenses in place.
The Enterprise returns with Sela, Martok and a bunch of other ships and Picard assumes command over the fleet. The Borg are driven off from sector 001. Admiral Howthorn is suggesting the bolstering of defenses around Mars, which Picard states, will not be enough. The Borg will come over and over. The only solution is to drive them from the alpha quadrant altogether. Picard, still having command over the fleet, sends out to get this task done.
The Alpha and the Omega, Part I

Tasks
This is a capturing mission. You start out with a Construction Ship of Federation, Klingons and Romulans, as well as the Avenger, the Enterprise-E, Martok's Negh'Var and Sela's Warbird. You have the techtrees of all factions at your disposal.
- Destroy the Borg Control Center.
- Capture the Transwarp Gate.
- Hold out for 10 Minutes afterwards.
This mission is actually rather straight forward. Start with a Starbase for each faction (just in case you lose one of your construction ships). But do not recrew them to 1500 right away. Otherwise you will run out of crew. Continue with three Mining Stations and two Dilithium Freighters for each near the surrounding Dilithium Moons. You will not have the resources at hand to build the entire techtree of all factions without expanding to nearby Dilithium Moons. So you will have to either prioritize or expand early. The incoming waves or Borg are not to be underestimated. Especially the Diamonds and Cubes can rig havoc on your base. The Temporal Research station will most likely be more valuable than the Romulan and Klingon weapons of mass destruction (at least until you have the resources to make use of them). So it is recommended to build Federation up entirely.
Destroy whatever comes your way, except of course the Transwarp Gate. If you can/want to, capture the Assembler that is located on the other side of the Metreon Gas Nebula near your base and use the Borg units as well. It is practically undefended. As the Borg have again no Tachyon Detection Grid, they will not be able to uncover your cloaked ships. So having a Talon scout the map is prudent.
Before you take over the Transwarp Gate try and fortify the area around it and your base. Once you have done so, take over the Transwarp Gate. You will have to hold it for ten minutes. Having Nebulas and Shadows with Federation Repair Team, Shield Disruptor, Holo-Emitter and Energy Shield Converter near it can go a long way defending it. While you are waiting, the Borg will roam the map, which can also mean they attack your base. So do not let it be unguarded.
At all times, beware of getting one of your Hero Ships destroyed. In the beginning you may need them for defense purposes (except maybe the Avenger). Later on try keeping them out of harms way. Cloak those you can cloak.
Story Line
The three allied factions each send their representatives and one construction ship to confront the Borg. In order to reach them, they plan to capture their Transwarp Gate and travel to the other side. In order to do so, the Control Center in the area must be destroyed. Once the Borg attempt to recapture it is successfully repelled, Worf is ordered to prepare his diversion. (Coming up in the next mission.)
The Alpha and the Omega, Part II
Tasks
This is a search and destroy mission and probably the most tough one. You start out with the Avenger, two Bird of Prey, a Shrike and two Griffin. The earlier given Enterprise-E, Martok's Negh'Var, Sela's Warbird and the two additional Sovereign you will not have for long.
- First order of business is to retreat the first wave of ships from the battle field.
- Do not let the allie's Hero ships get destroyed.
- Capture an Assembler.
- Build a Transwarp Gate with it.
- Don't let the Avenger be destroyed.
- Don't let the Transwarp Gate get destroyed.
- Destroy the two control Nexus.
- Destroy the Omega Containment Facility.
When arriving at the first part of this mission, immediately return to the Transwarp Gate. Use your special weapons to get rid of the attacking Cubes. When told so, send all your ships through the Transwarp Gate.
Once done, the Avenger and a few more ships will be given to you. Cloak them and head out to one of the marked positions. Do not rely on the cloak to scout out the map early. This time the Borg have the Tachyon Detection Grid, so avoid any Detection Arrays for the moment. Therefore avoid the entire upper part of the map. Head directly for one of the marked spots. The right one is recommended, as it has a Processing Node there, which will come in handy. There is one Dilithium Moon at each of these locations, but you can only go for one with your group. Take the other one later.
Destroy the defending Interceptors and Energy Cannons (but leave the Processing Node and Dilithium Collector alone). Capture the present Assembler. This Assembler is special in two ways: 1. it only has 100 crew (otherwise you would probably have a hard time taking it over if it had the normal 500 crew complement) and 2. it can only construct Transwarp Gates. Place the Gate rather close to the map border, so that it is not exposed to enemy attacks that much. Once you completed the Transwarp Gate you will probably not have any use for the Assembler any more. Recycle it, if you need the resources.
When completing the Transwarp Gate, Martok, Picard and Sela return with a construction ship from each of their factions. You will hardly have the resources to build all three tech trees completely until in the mid- or late-game. Focus on the Klingons. They have the second-strongest boarding parties and can produce ships very fast.
Attack the Processing Node and capture it, too. That will reveal the Borgs positions and also give you an additional 650 Dilithium, when you recycle it. Use the Dilithium Collector to begin mining, while you build your Starbases. Place the Starbases above the planet, making use of the crew income bonus. You will need it. Once done, build a Dilithium Refinery and recycle the Processing Node. (It's position is not optimal.) Build the Klingon Techtree and use a lot of Torpedo Defense stations, creating an internal defense, too. Whether you try to go for the Shockwave Station or not is debatable. Later you will probably prefer the Phoenix in combination with the Transwarp Gate, to blow the Borg to hell.
Keep a low profile, until the Borg notice you. Once that happens, they will come wave after wave. The Borg will try and reach for the Transwarp Gate or attack other backward stations. You will want them to be defended as well. Especially the Transwarp Gate can use a fence of turrets. You will want to use Nebula, Shadow and Raptor ships with Shield Disruptor, Federation Repair Team, Energy Shield Converter, Holo-Emitter and Myotronic Inhibitor to destroy the attacking parties and restore your defenses. So you will need the other techtrees as well, to effectively battle the attackers. The Enterprise, Martok and Sela will be of great help with the early attacks but once the attack groups get bigger, you might want to keep them out of harms way, e.g. protecting the Transwarp Gate.
Once you are strong enough, begin heading out to attack the Borg positions. The Transwarp Gate you already possess can get useful, as the mission states, to get to locations behind enemy lines. E.g. destroying the Borg's Transwarp Gate should reduce the number of attackers. Also you can get rather easily to the other corner of the map, where the second Dilithium Moon designated as target is located. As you will not get nearly enough resources from one moon you should get the other one and fortify it well.
On the long run you will have to expand forther. Luckily there are three Infinite Dilithium Moons on the map. Securing one of them should be one of you primary goals. The one near the Transwarp Gate is located rather centrally on the map, but you would kill two birds with one stone. Getting rid of the incoming waves via the Transwarp Gate and securing an unending resource spot.
You might want to keep a defenseless station around for using a Romulan Spy on it, regularly. That can help you track the movement of the Borg considerably.
Once you cleared out the Nexus on the map, destroy the Omega Containment Facility. It is placed in the middle of the asteroid field ring, so you can only reach it in a sensible fashion with your Transwarp Gate. Sending in a Phoenix and using it the moment it reaches the other side is probably the easiest way to do this.
Story Line
Martok, Picard and Sela reach the other side of the Transwarp Gate, escorted by two Sovereign ships and a Construction ship of each of their factions. They are immediately intercepted by Locutus, who anticipated that move and threatens to kill Picard. The group retreats back through the Transwarp Gate, which is destroyed afterwards by the Borg, to make sure the attackers cannot return.
Unnoticed by the Borg, the Avenger and a few supporting ships also arrived while under cloak. So after the destruction of the Transwarp Gate they are still present. They head out and capture an Assembler, to re-build the Transwarp Gate. Once done, the Heros return, beginning building their base. The Borg, having noticed the Transwarp activity, enforce the Omega Containment Facility with two Nexus, which will have to be destroyed, before the Facility can be destroyed (and the Omega particle along with it). Along the way Locutus' Cube is destroyed and a Sphere retreats from the battle field through a time rift.
The combined forces of Federation, Klingon Empire and Romulan Empire achieve this, causing a subspace shockwave that destroys everything in a large radius. After their successful retreat through the re-built Transwarp Gate they are received by the Premonition but shortly after all three vanish. They are erased from history. The Enterprise-D is reported as being lost eleven years ago in the Daneb system. However somehow the Premonition seems to be unaffected by that change of history, explained by their different quantum signature (they are foreign in this time frame). In order to correct the tampering with the time line, the Premonition returns back into the past another time, to intercept the Sphere, that retreated earlier. This is also the moment, Picard sees the Premonition for the first time. This closes the greater time loop. The Premonition returns back to the moment after the Heros emerge from the Transwarp Gate back in the alpha quadrant.
Now that everything is as expected, the Premonition returns to its own time frame into the future. Shortly after that the alliance begins to destabilize, which Worf as ambassador for the federation tries to prevent.
This mission references the first Star Trek: The Next Generation episode pretty directly. The Farpoint Station story was concluded just before Picard is attacked by the Borg Sphere, that is subsequently destroyed by the Premonition. Also the idea of a Sphere traveling back in time the moment a cube is destroyed, to change the past, is not a new idea. Star Trek: First Contact has pretty much the same plot.
Trivia
This mission cannot be won by destroying all ships. Even when cheating yourself enormous amounts of health and crew to certainly survive anything thrown at you (ODF modification), bit more than minute after the Transwarp Gate re-opening for the retreat the game starts with the next step of the script, the destruction of the Transwarp Gate, but the mission ends there.