Table of Contents
Optimal Sensor Placement
The Star Trek: Armada Sensor Stations are the eyes of an Armada player. Their range of 1000 (arbitrary game units) is the highest line of sight the game has to offer. As such they can be placed in various fashions. Some are more favorable in terms of simplicity, some in terms of efficient resource use and others in terms of resilience. The following considerations use images which show circles as depiction for sensor stations range. Blue lines show the limits of a sensor stations. Purple is a shape used for area calculations. Red areas are parts that are not covered by any sensor stations (blind spots), surrounded by the next neighbors in yellow. The black grid uses a distance of 200 which is equal to 2 grid tiles in Armada.
Maximum Redundancy
This pattern uses a grid consisting of equilateral triangles. Each station is surrounded by six other stations, except for the ones that are next to the map borders:
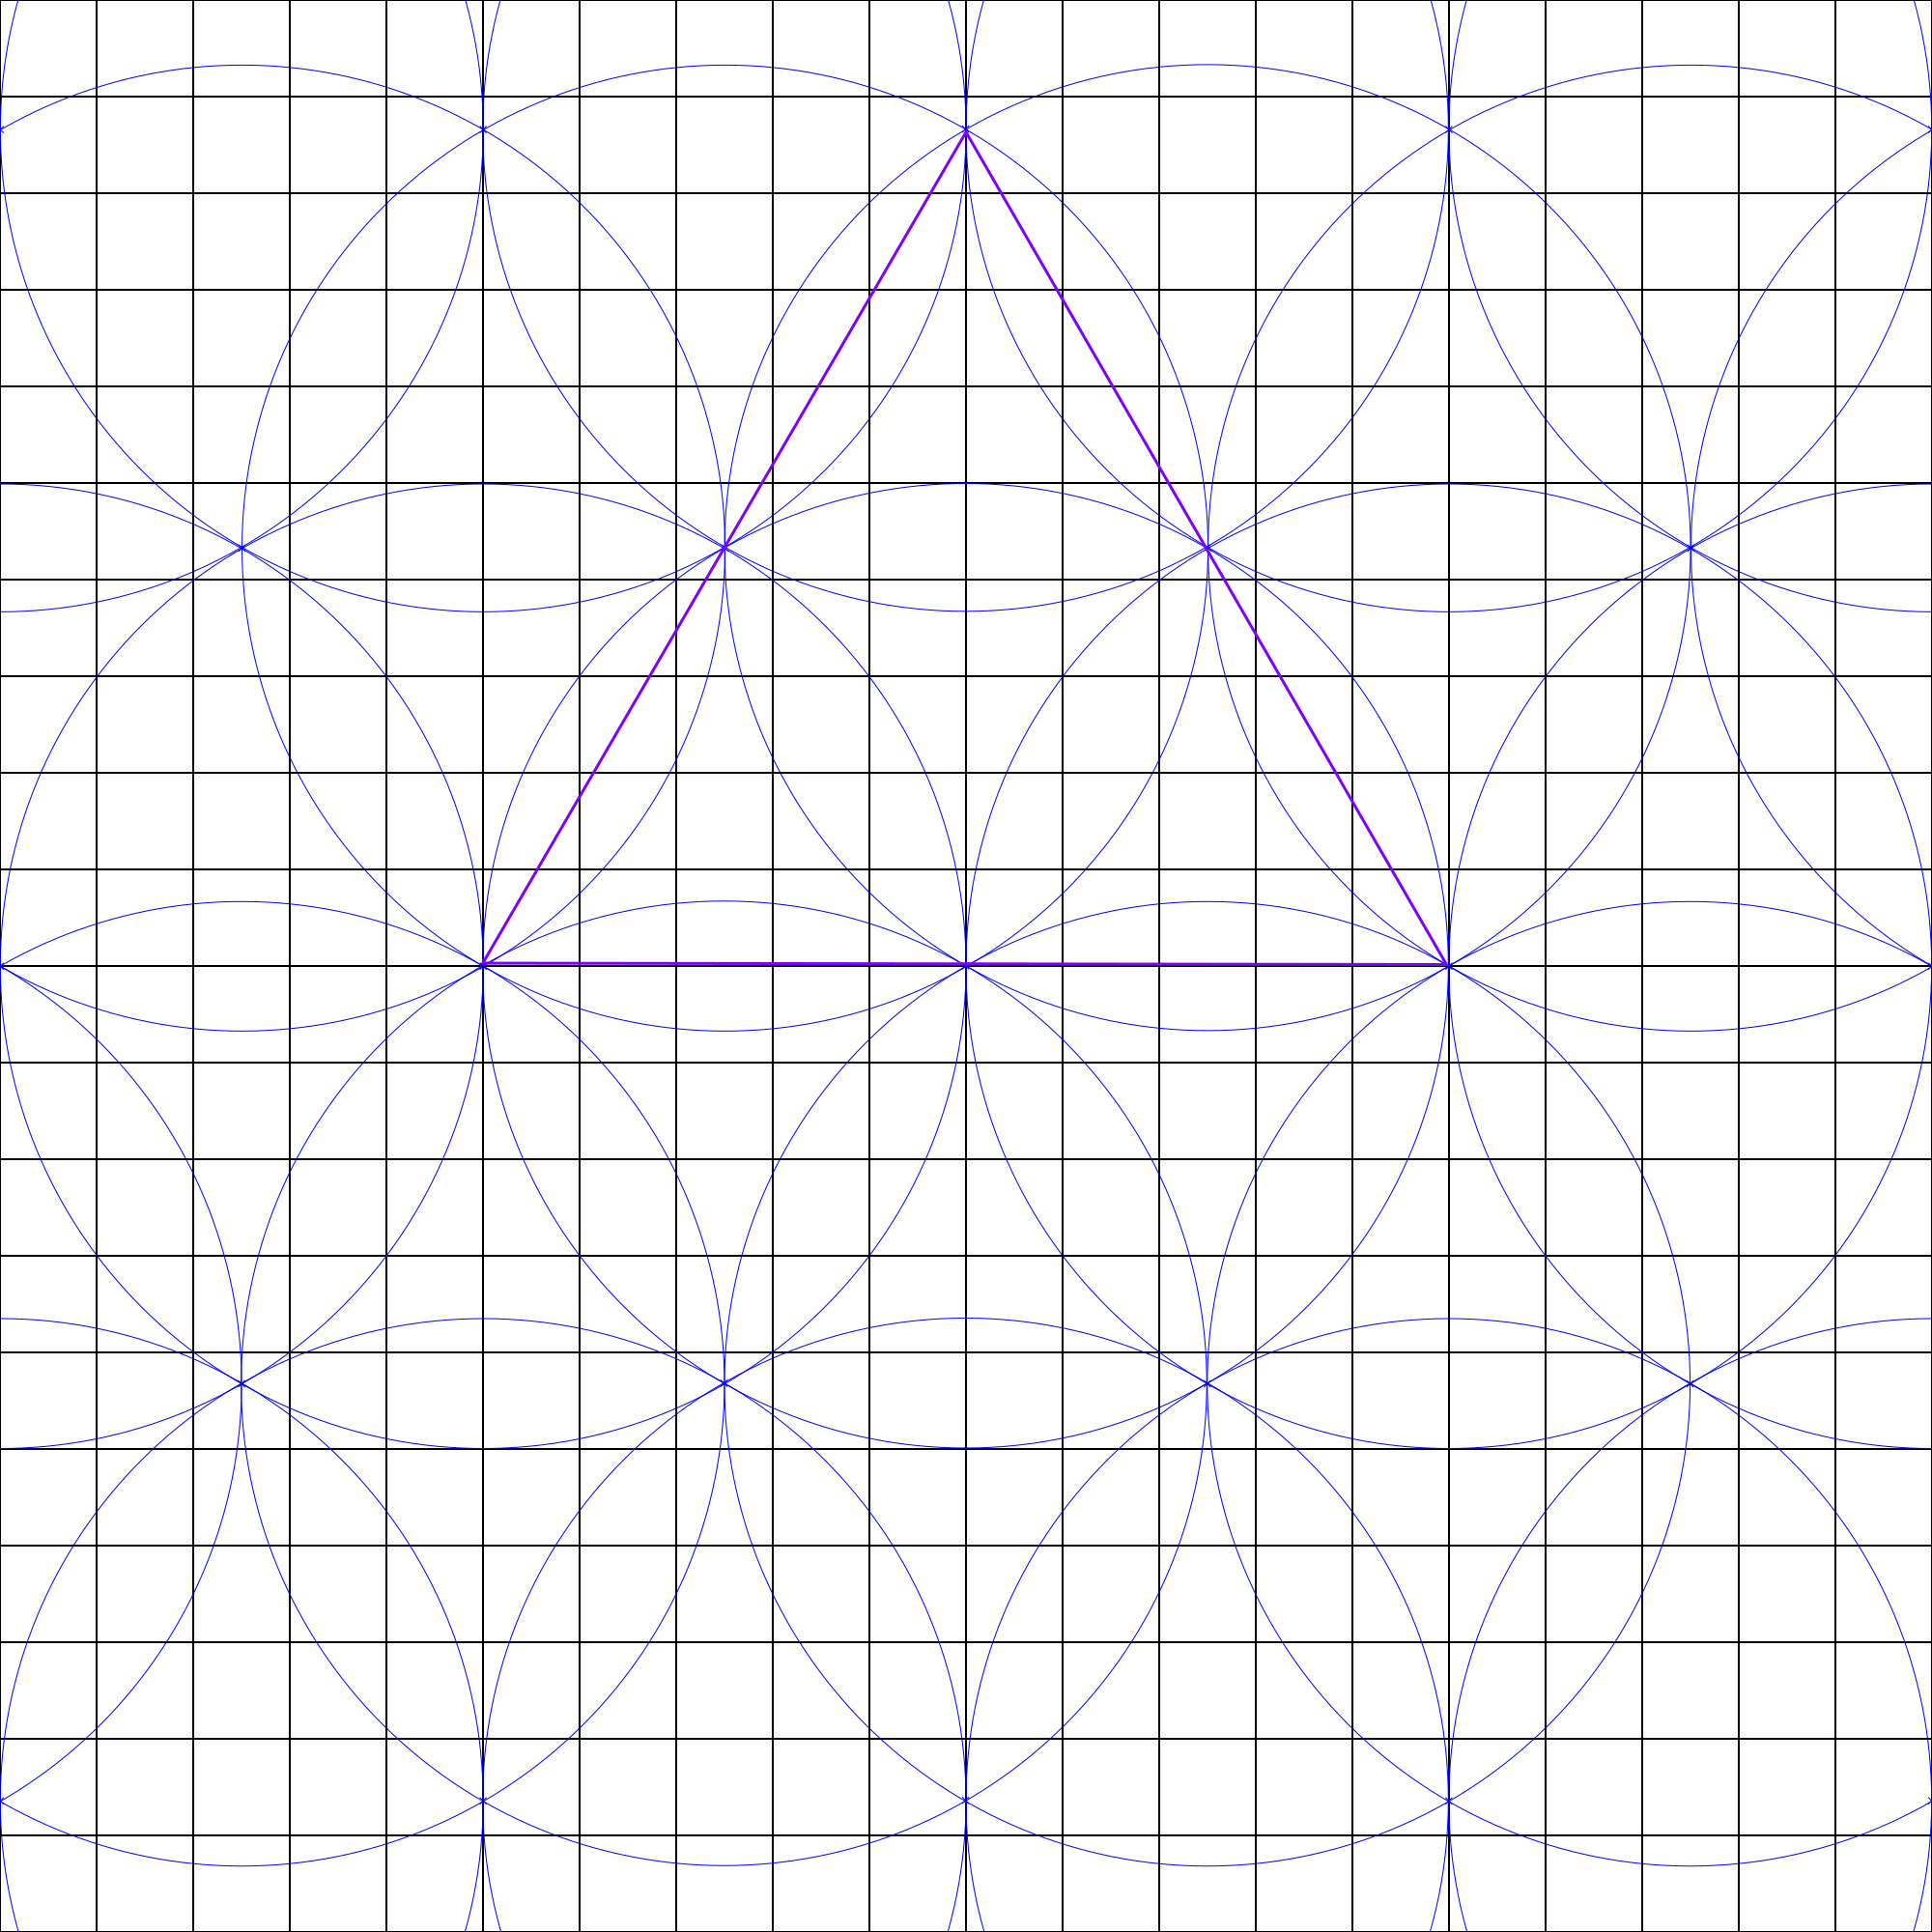
Considering the shown area (purple triangle) of $1.3\times10^6$ and the average sensor stations placed there ($2$), the area covered by one station on average is $0.65\times10^6$. To have a comparison: A sole station as an area of $3.1\times10^6$. So there is roughly only one fifth of the effective area of each station used.
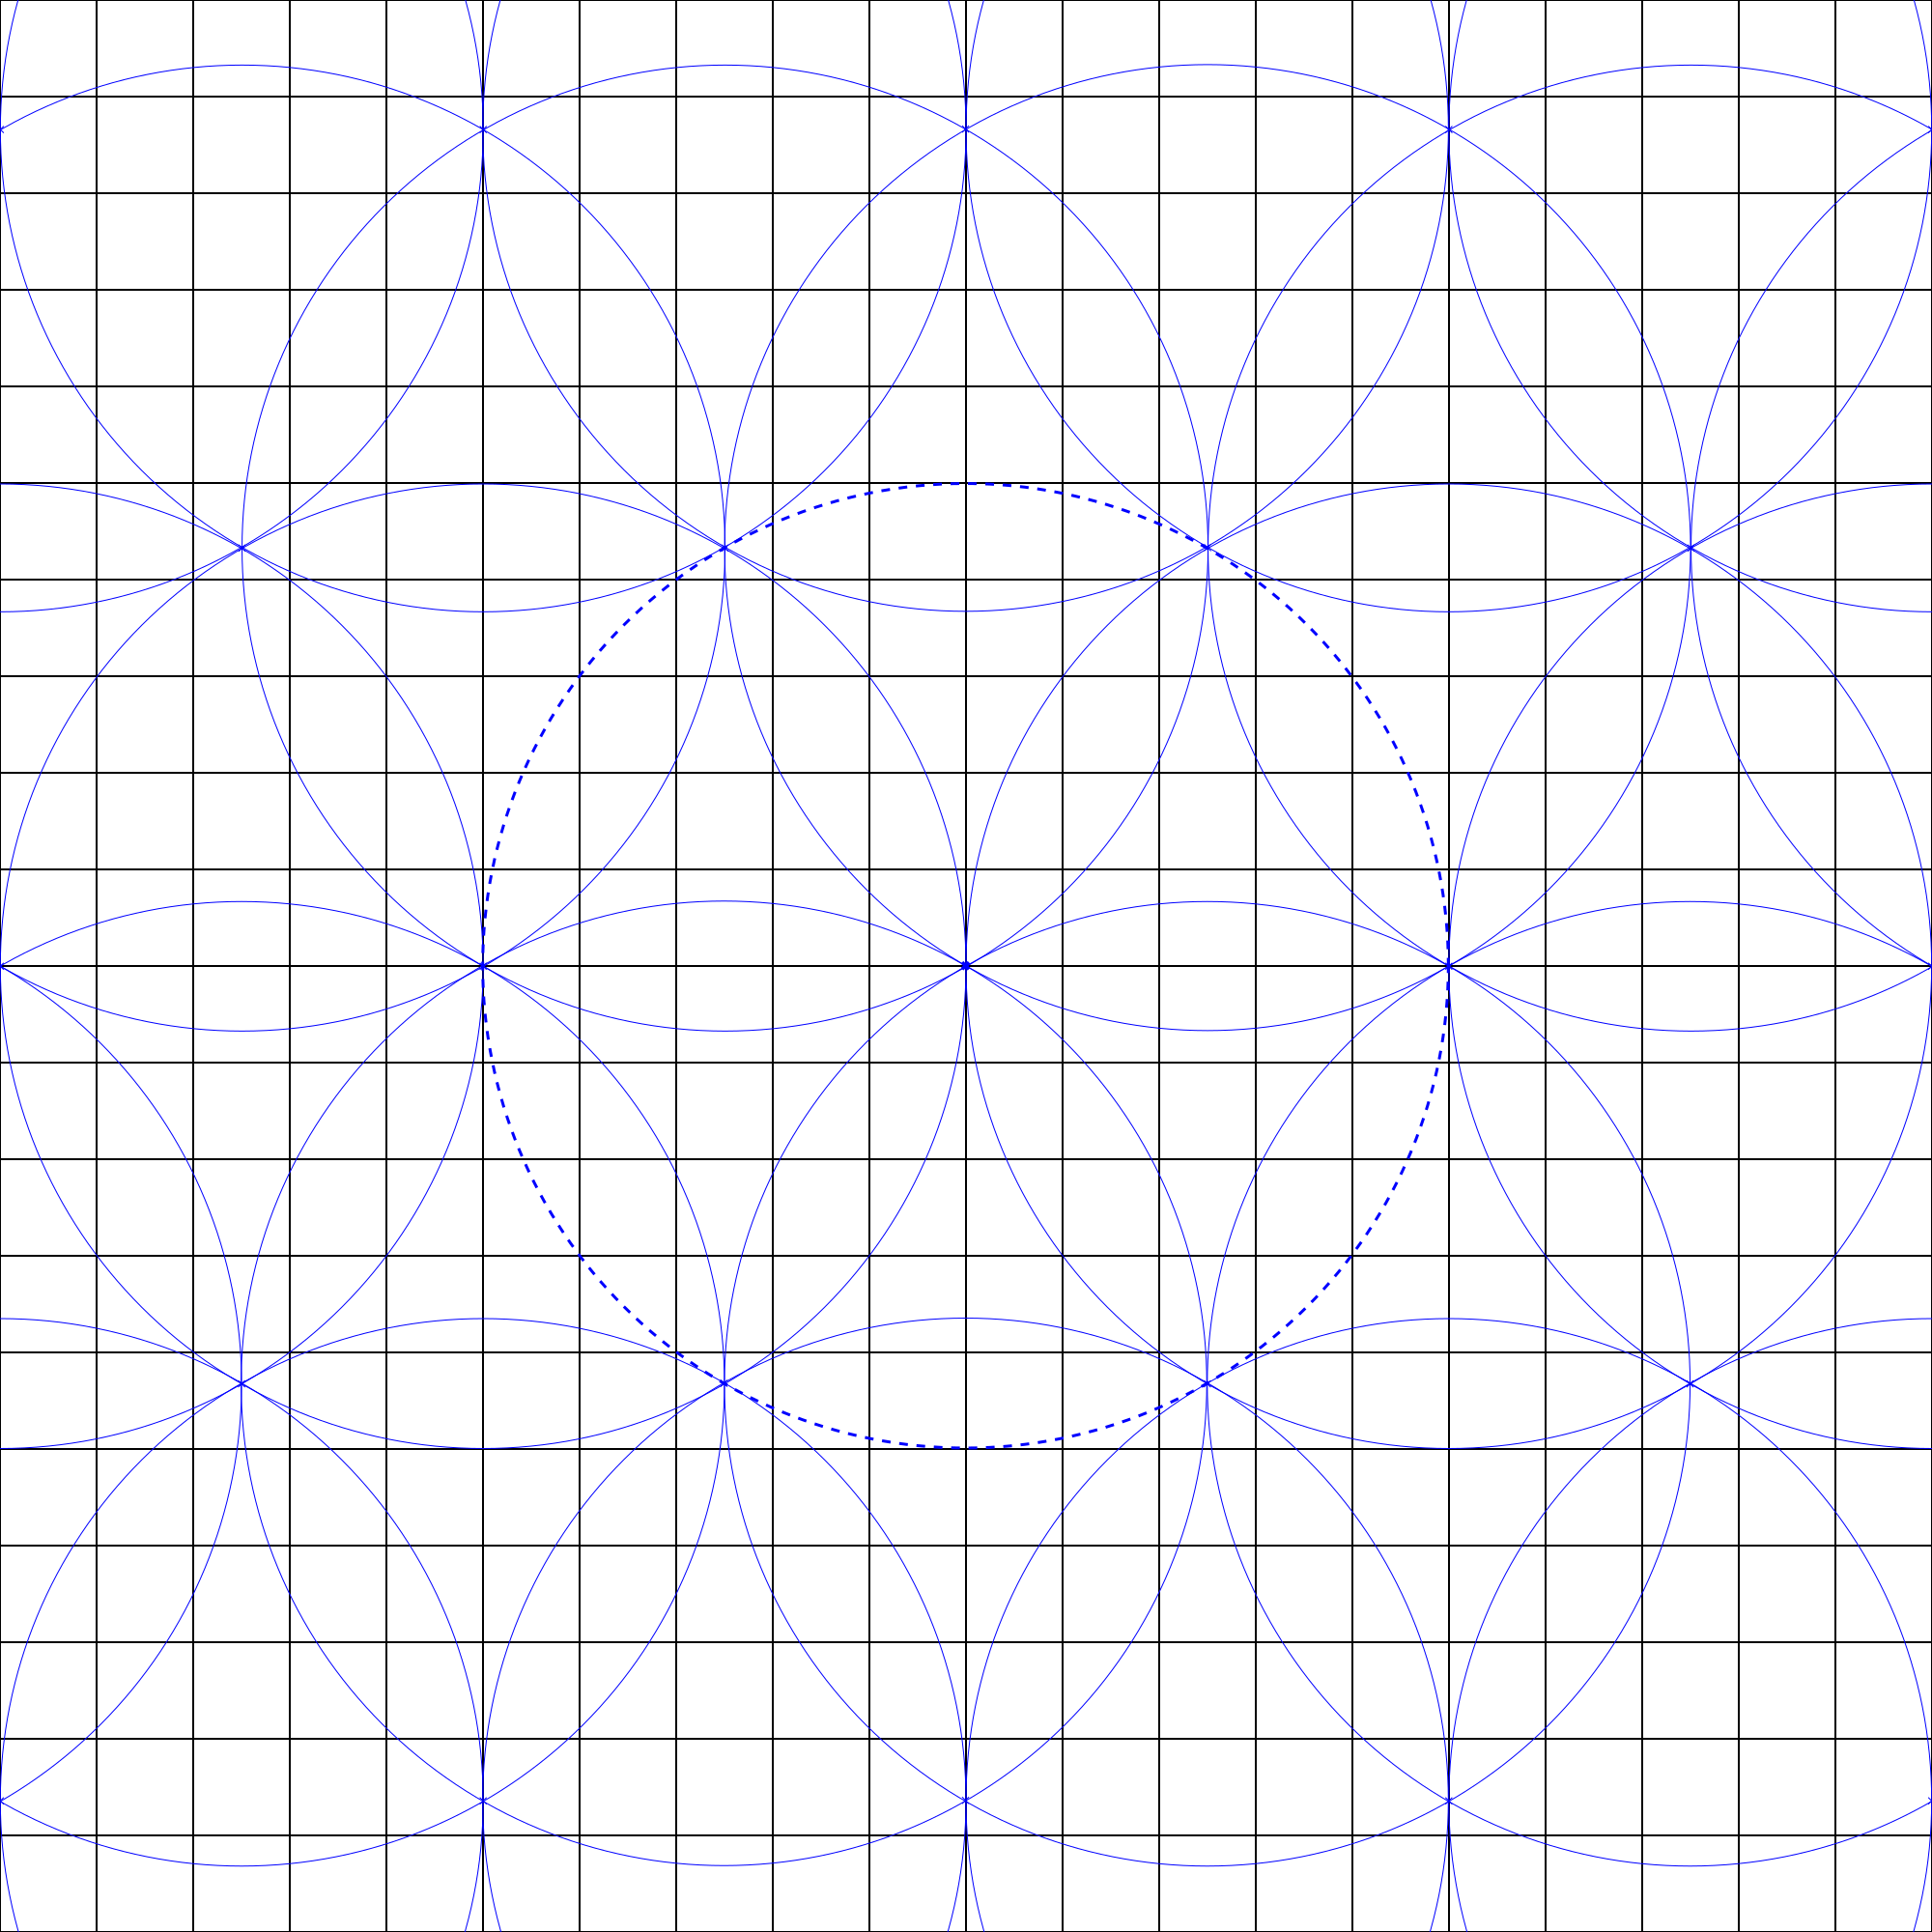
Using more stations is of course possible, but this pattern should provide enough redundancy for most cases. When removing one station, the entire area is still covered:
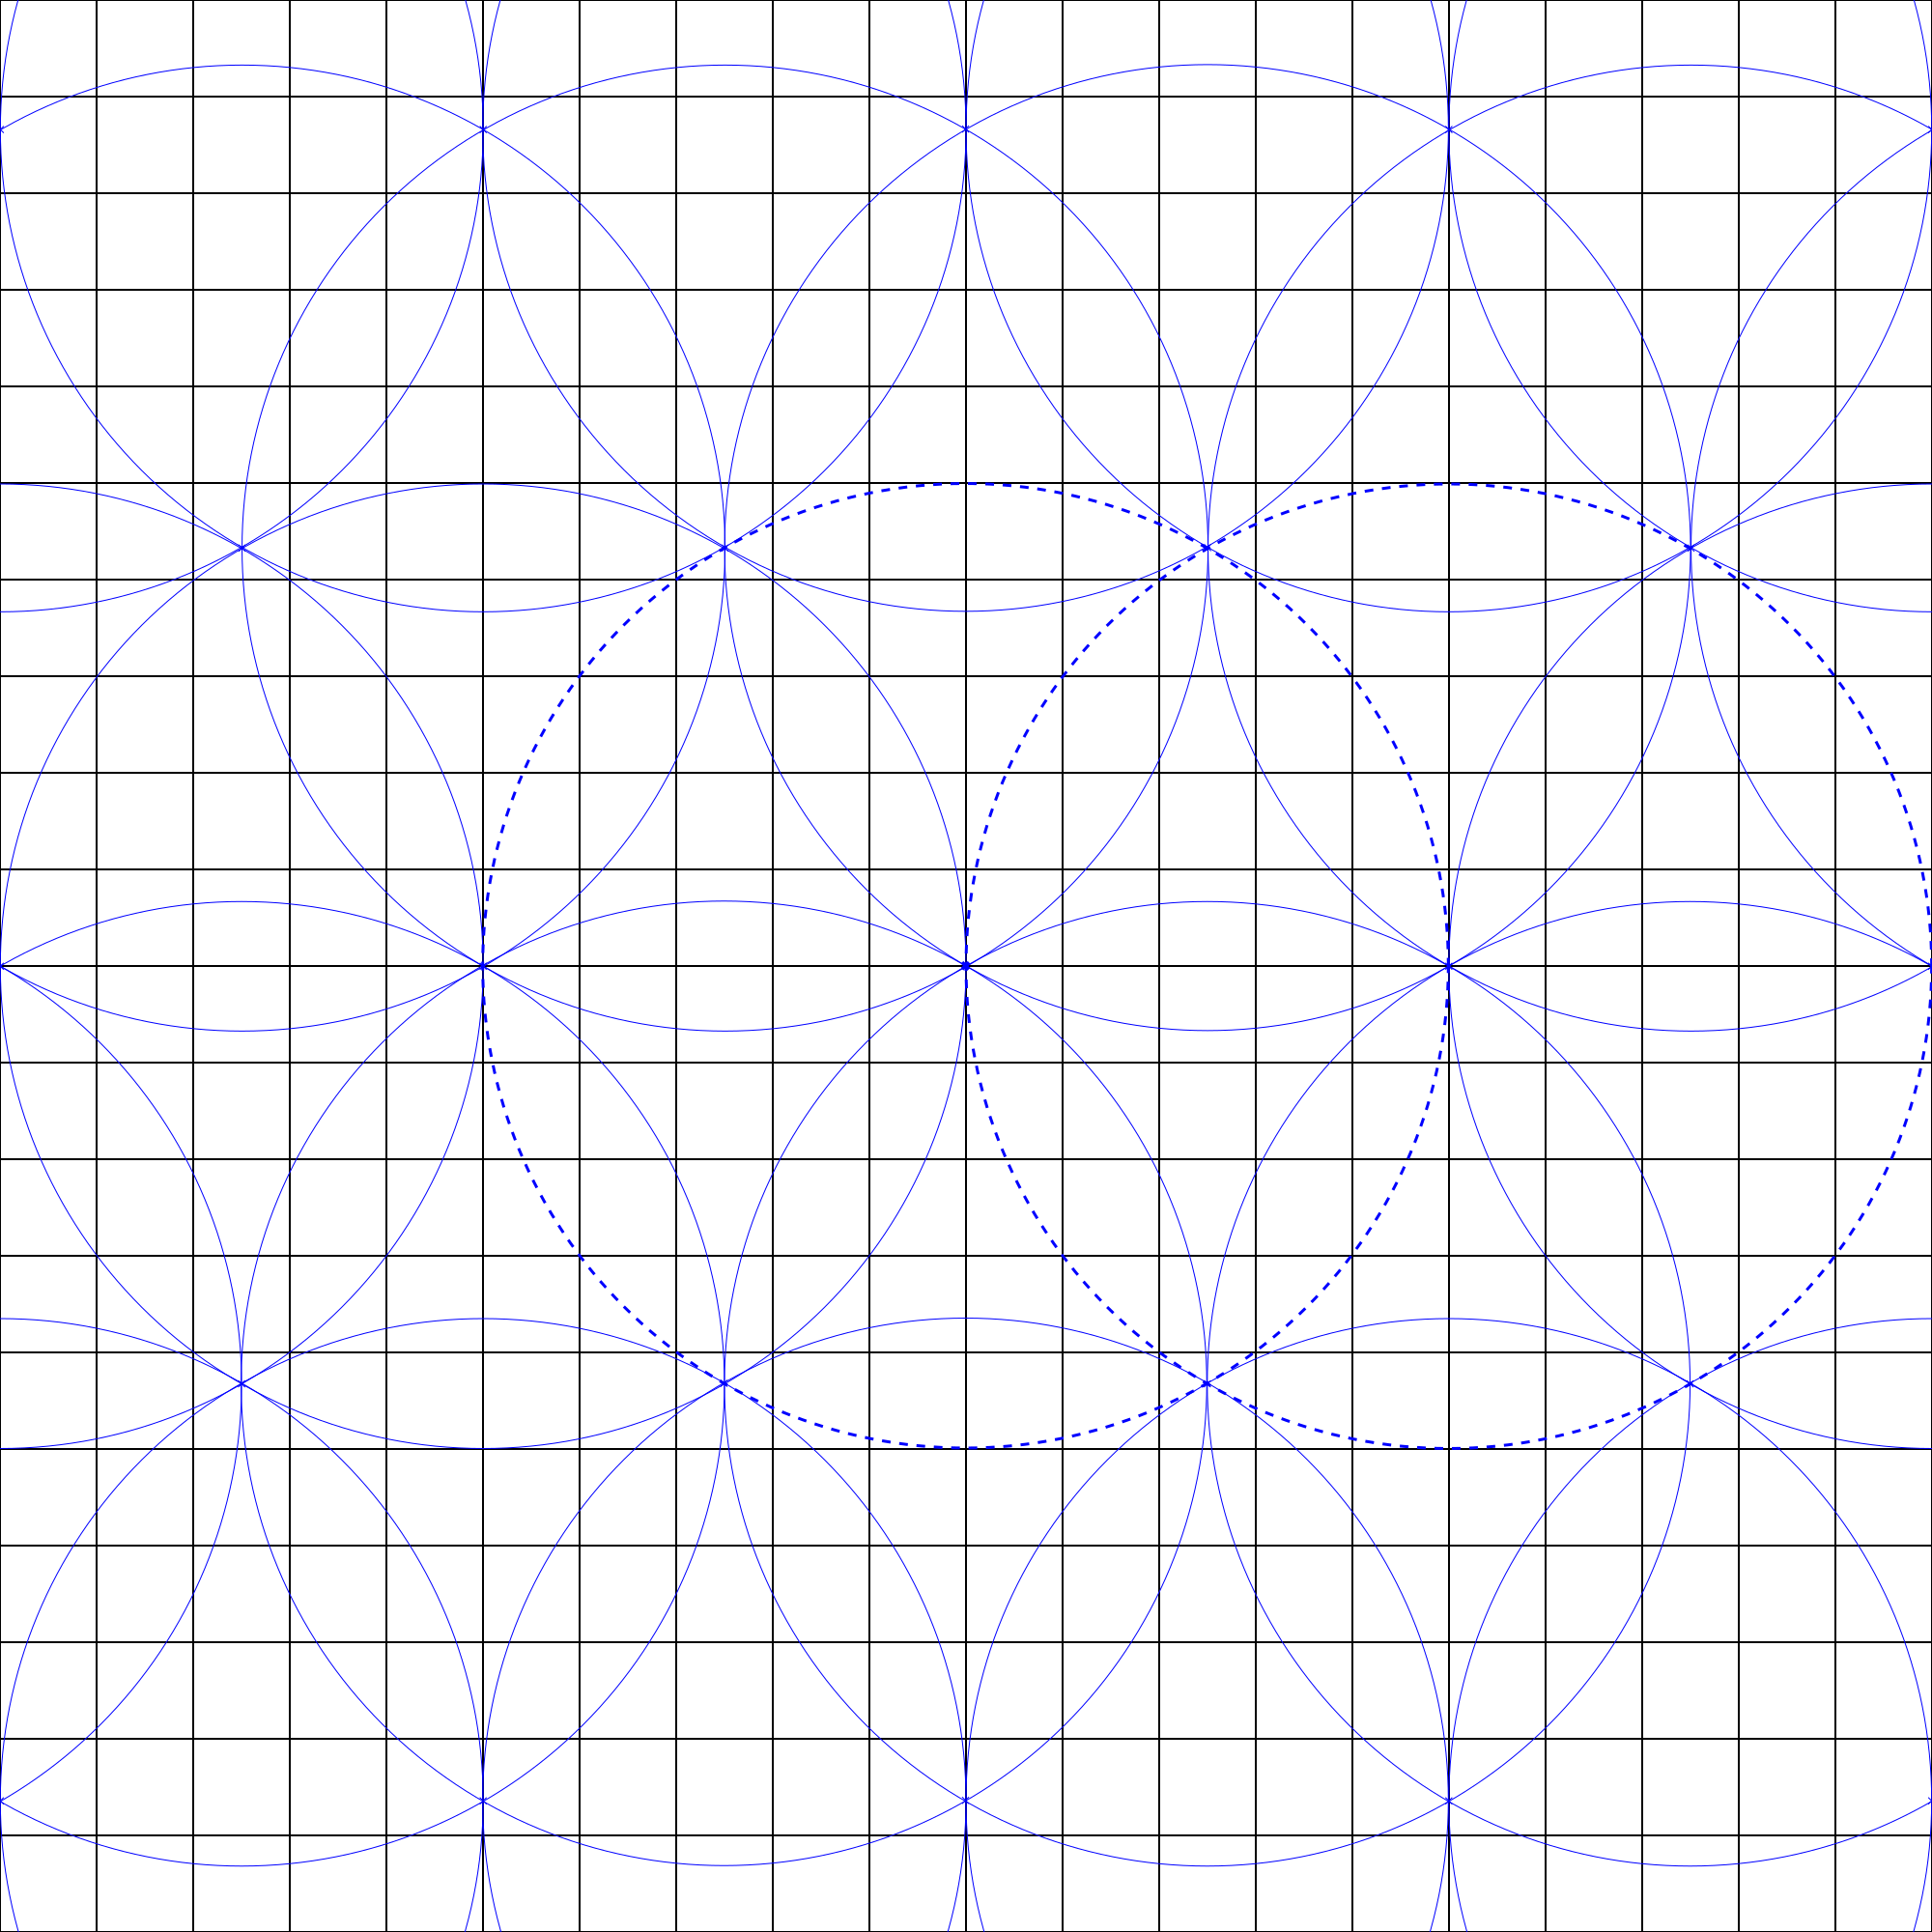
Even with two directly neighboring stations gone, there is still no gap in the coverage:
Only after removing three stations which are directly adjacent to one another will there be a gap:
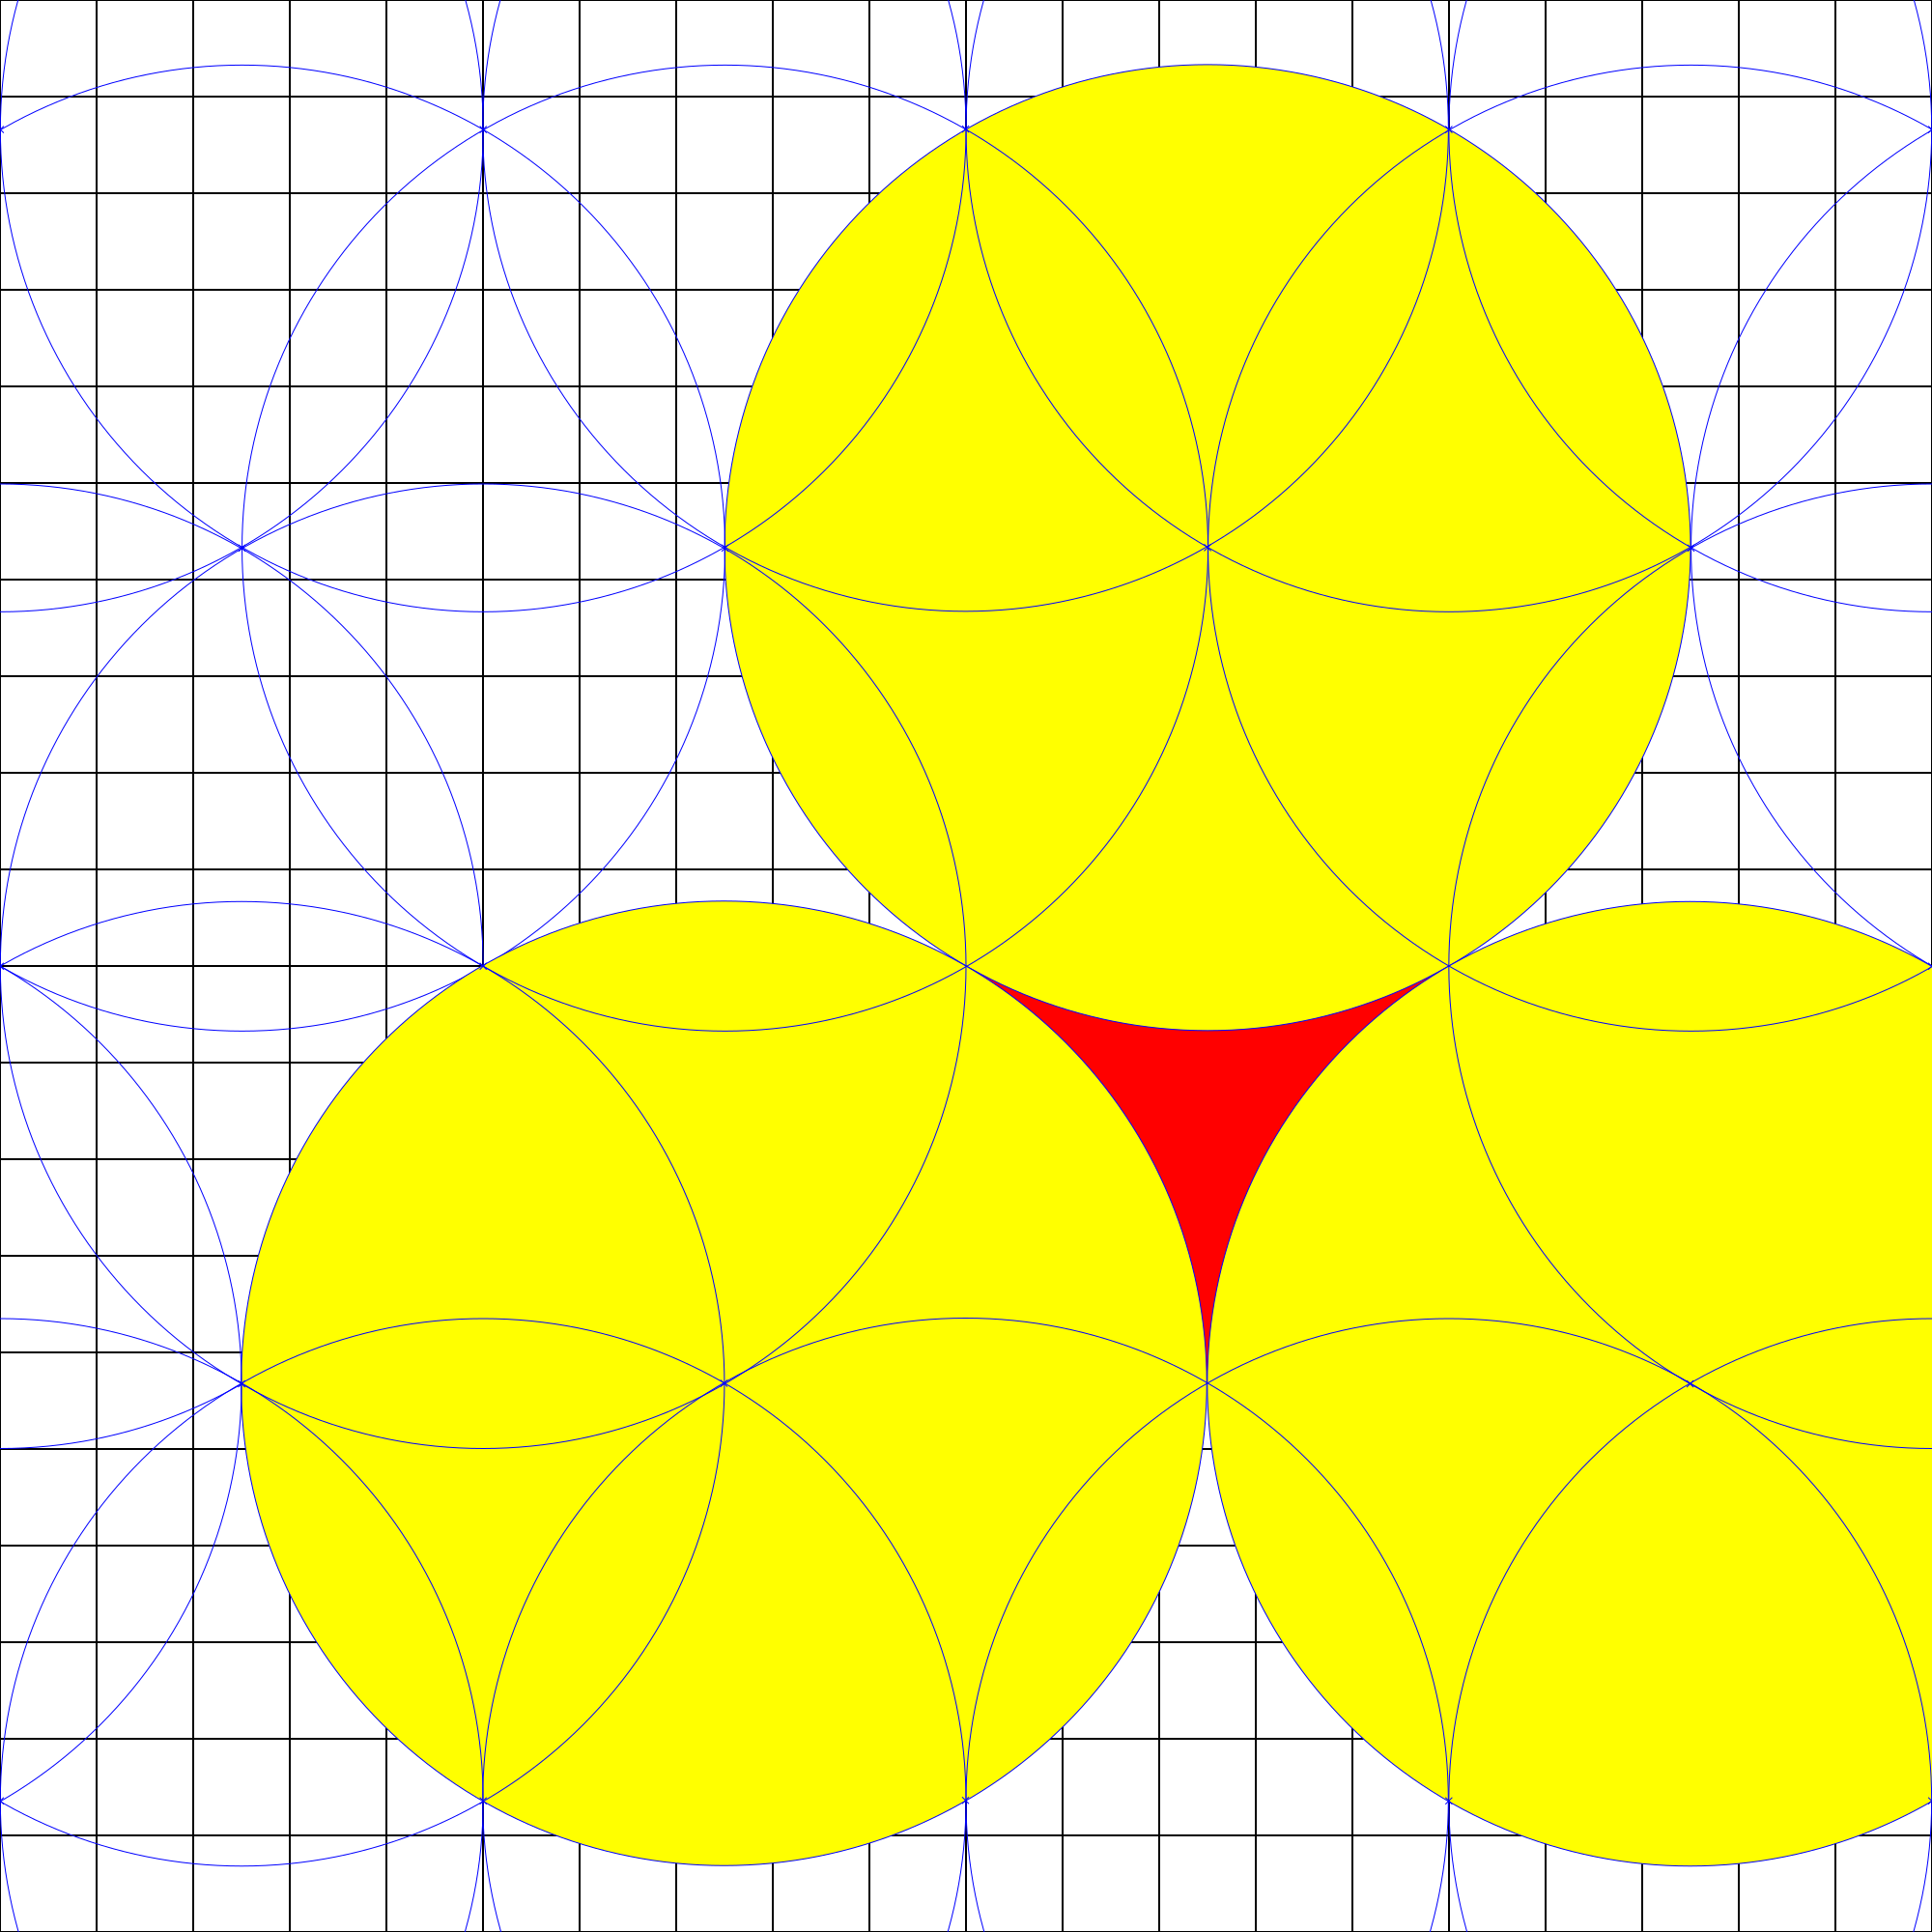
So this pattern is rather resilient against attacks but expensive to build. The placing is also not too straight forward: When moving 5 in one direction, 8.7 has to be moved in the perpendicular direction. But it is easier to use 5/8.5 grid tiles. This wastes a little bit of the efficiency, but does not compromise the redundancy at all.
Simple Grid
This shape simply uses square-shaped grid, with the vacancies filled with one station:
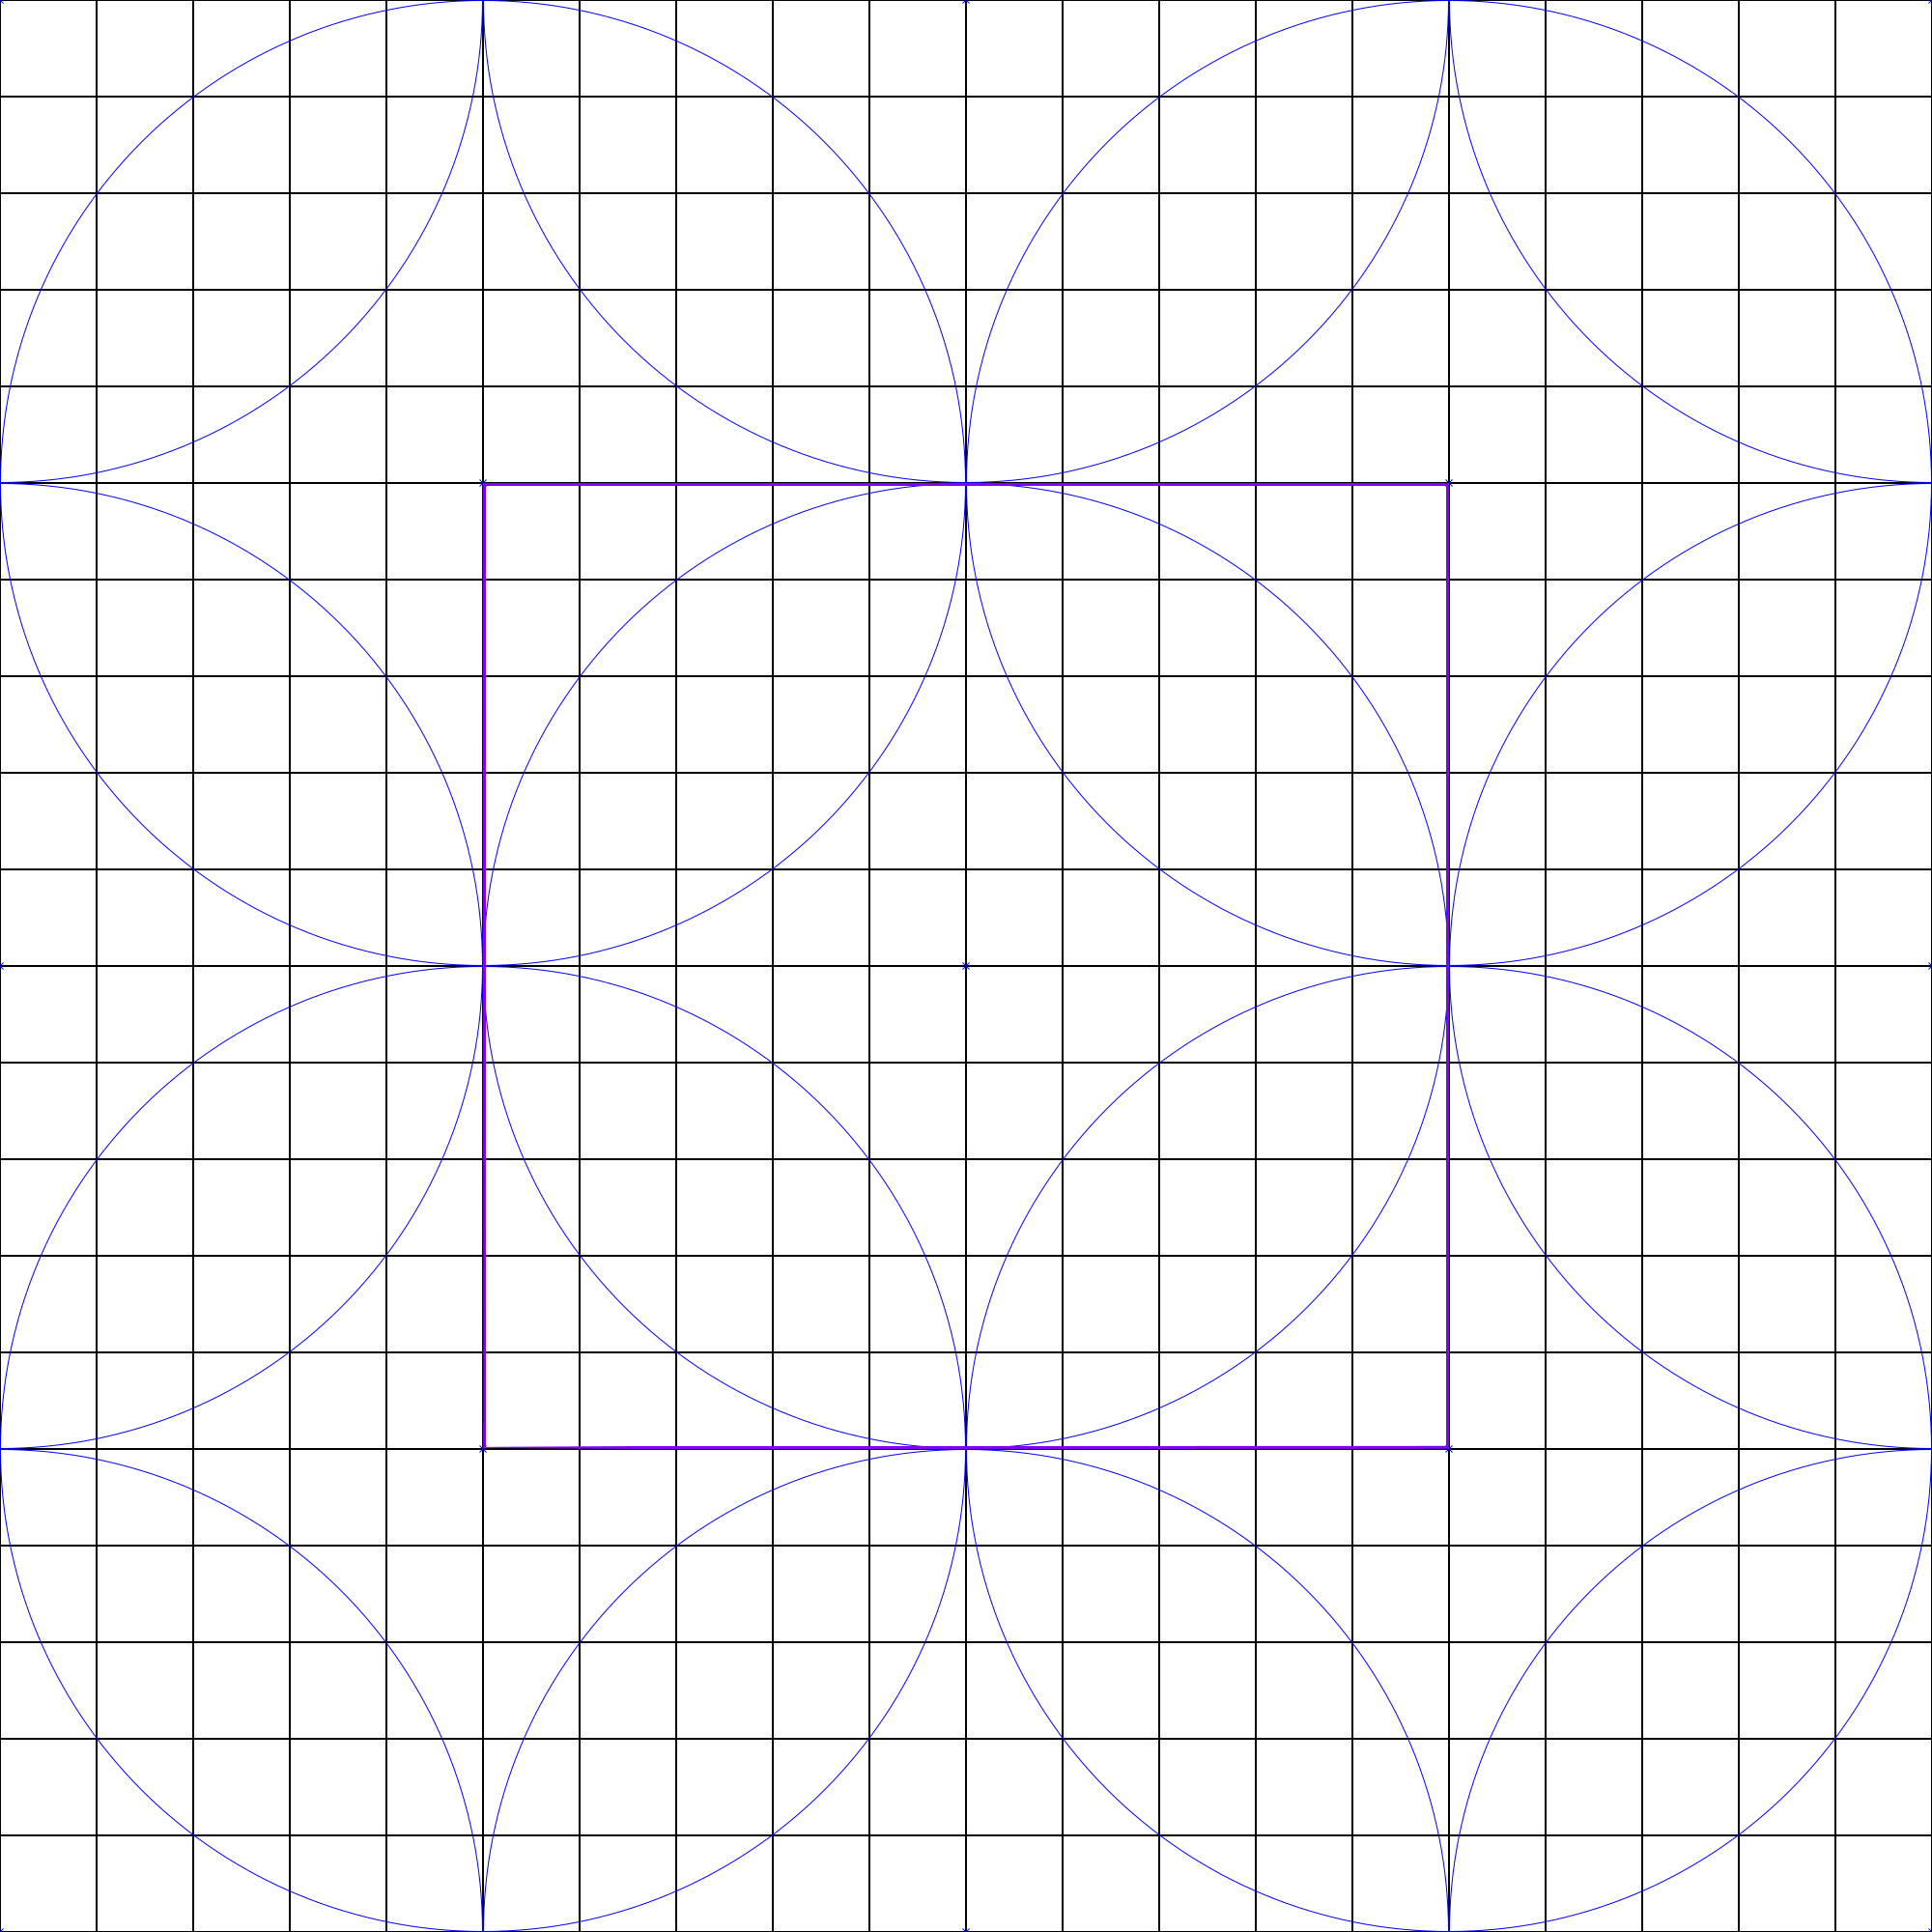
The enclosed area for this pattern is $4\times10^6$ and encloses $2$ stations on average. This makes the covered area per station $2\times10^6$. That's considerably better than the Maximum Redundancy pattern with $1.57$ stations more for the same area. The biggest problem here is, already one station missing leaves a gap:
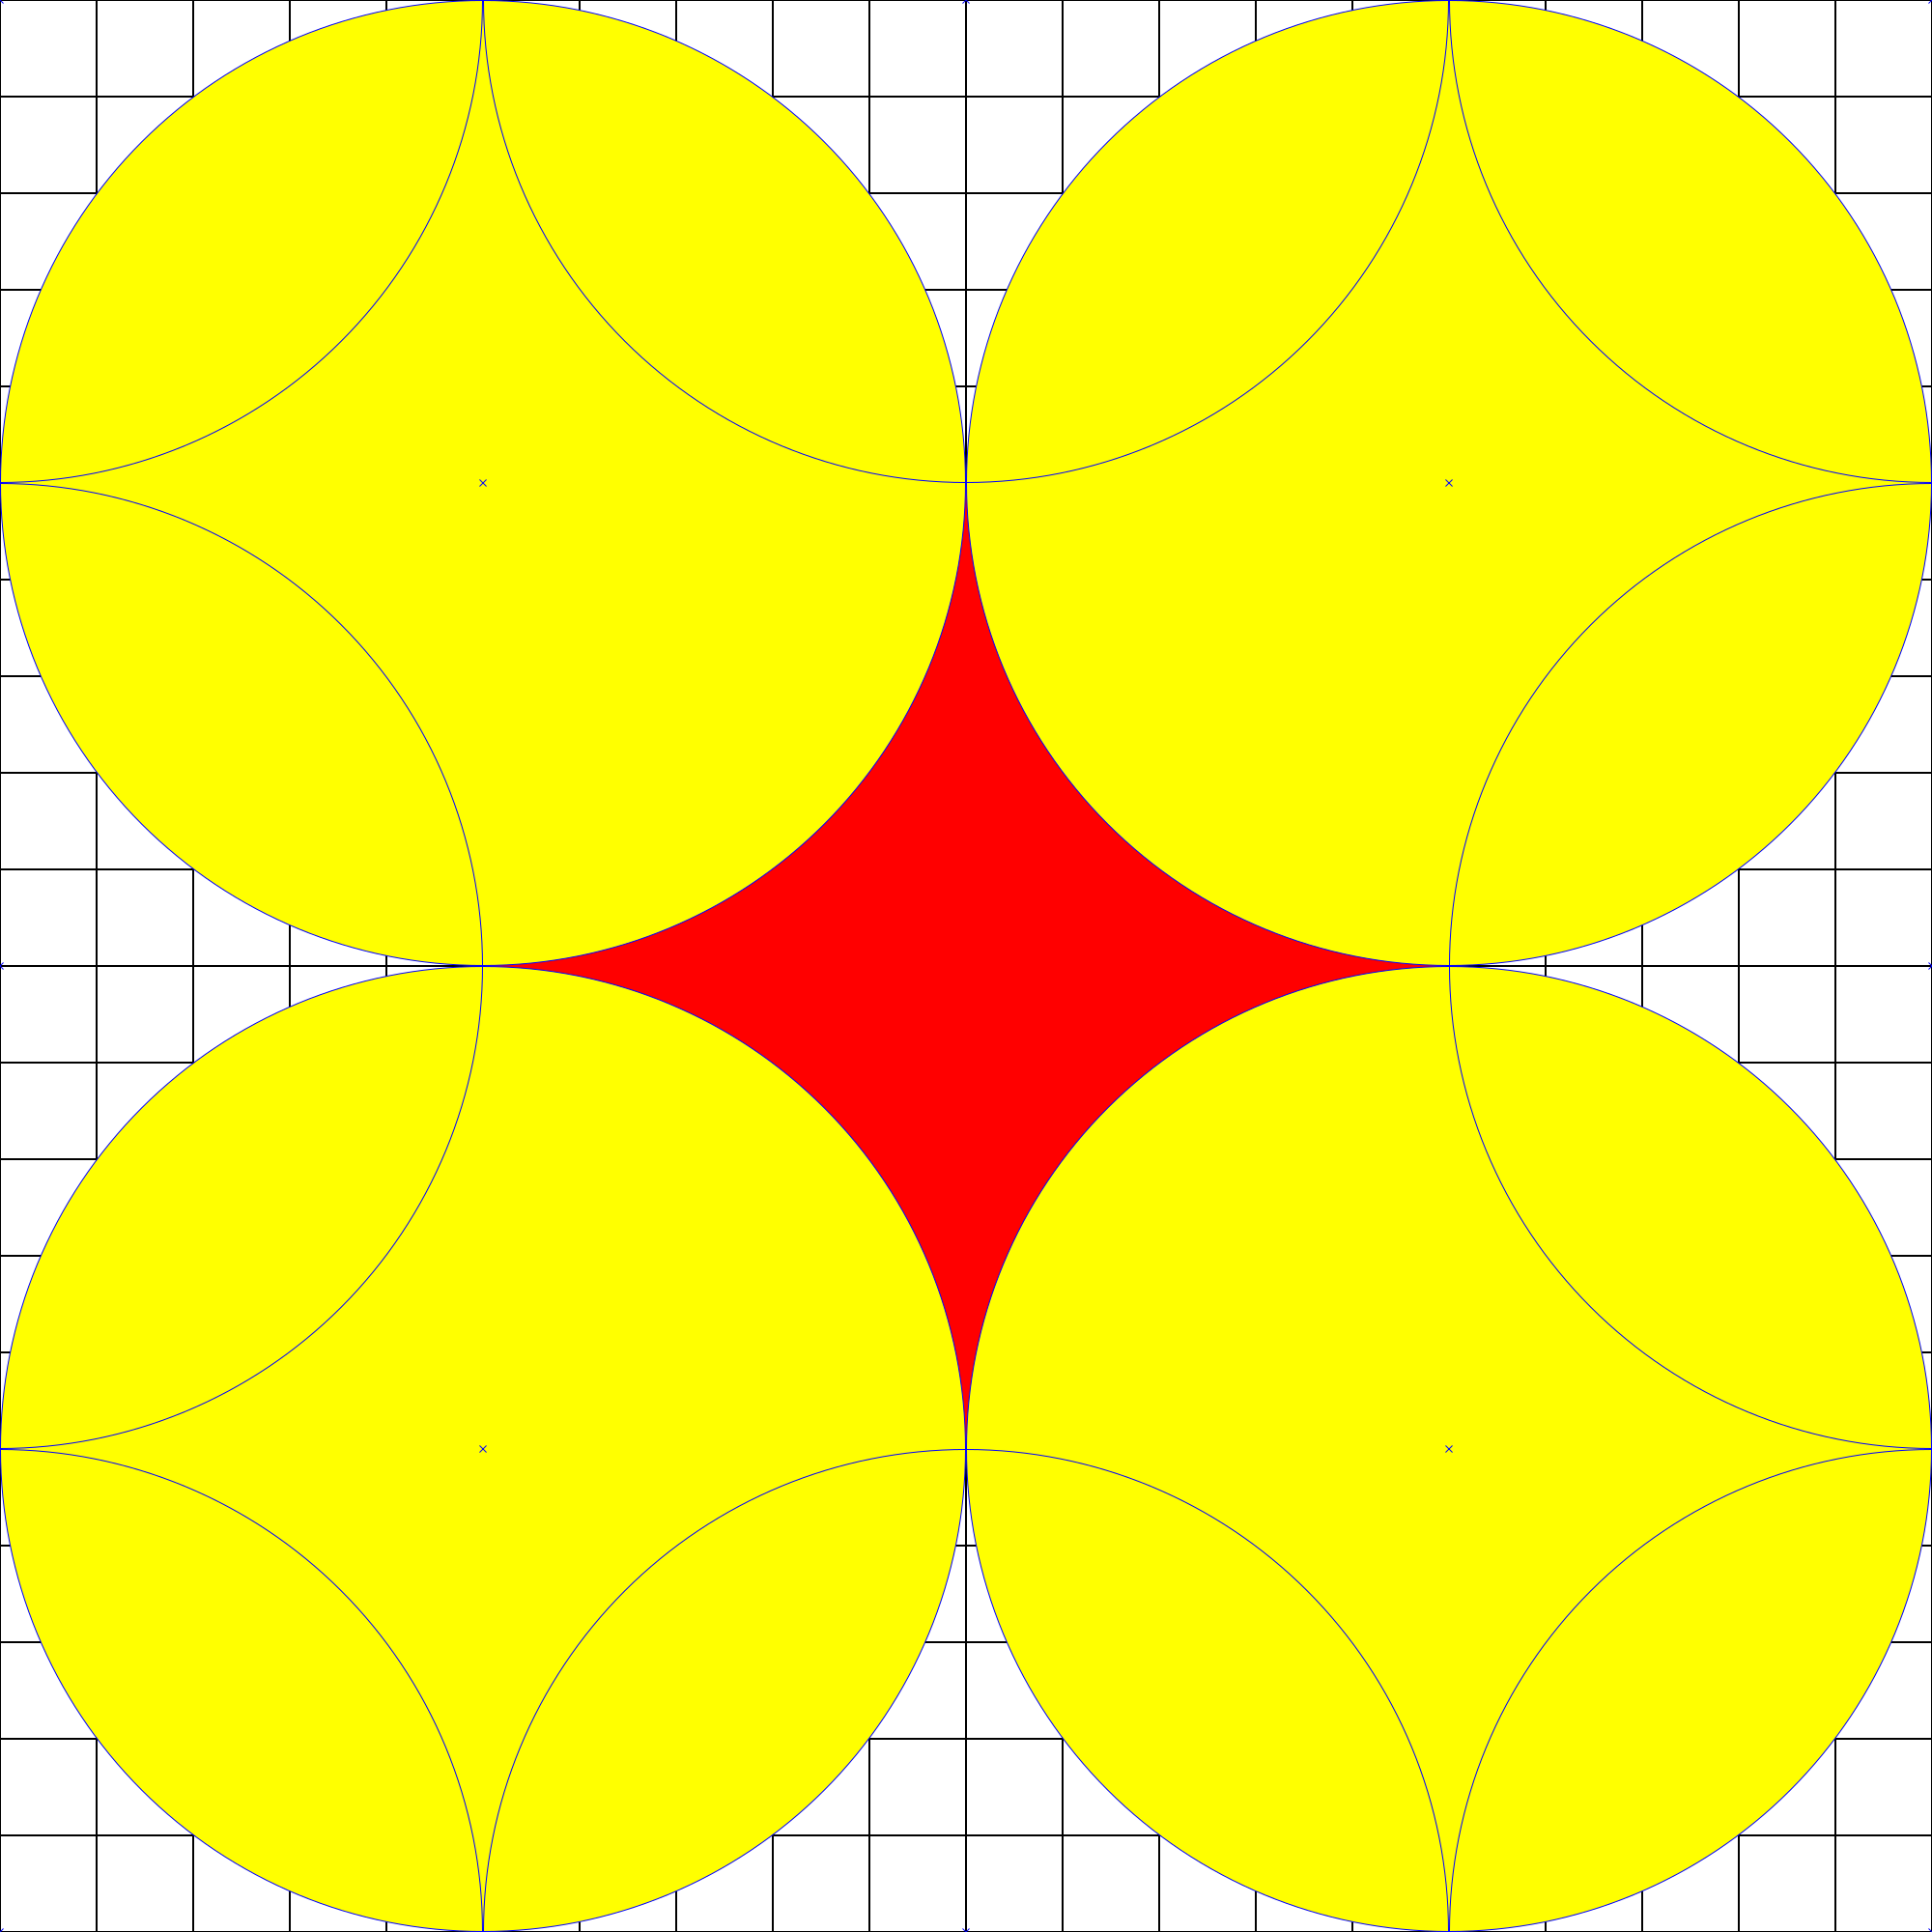
So the partial redundancy is effectively no redundancy at all. But it is a very simple pattern, spacing between parallel stations is 20 grid tiles $(2\times1000)$, while the gap stations are always 10/10 to it's nearest neighbors.
Minimum Redundancy
This pattern is basically a hexagonal grid, covering the entire area:
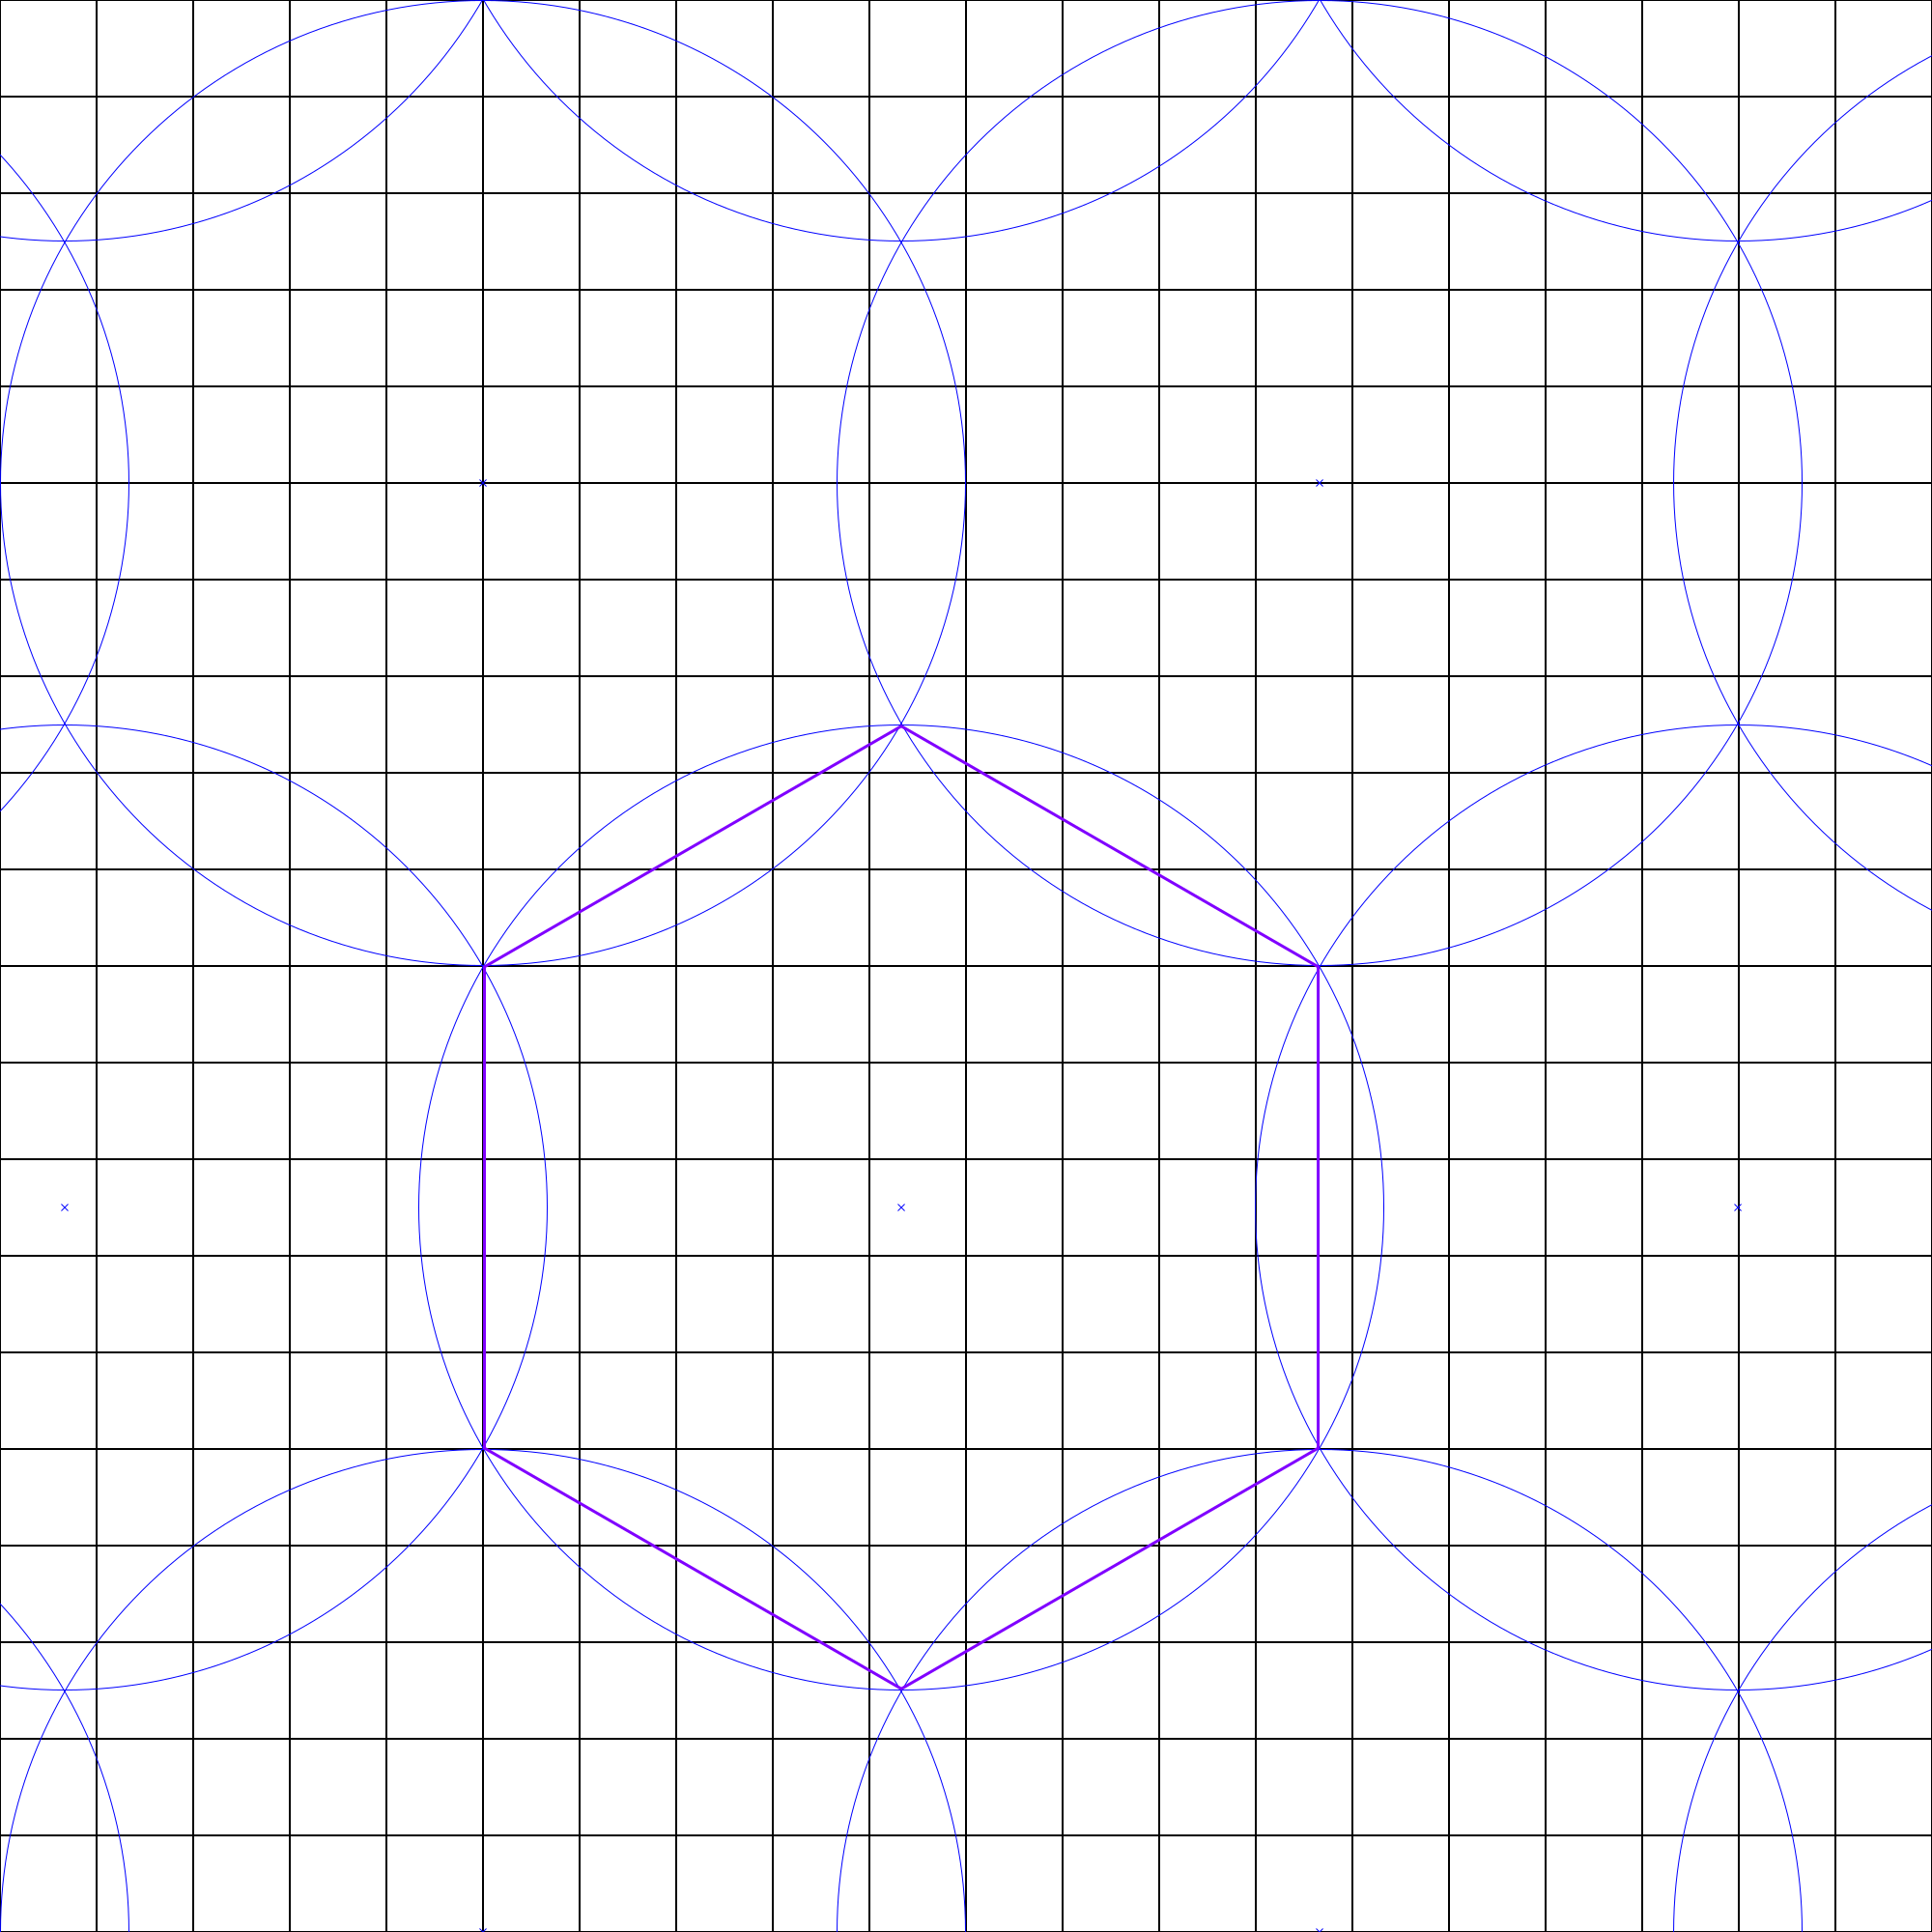
The purple area os such a hexagon is $2.6\times10^6$ encloses exactly one station, so the area per station is $2.6\times10^6$ or 83% of a sole station. It is very cheap to cover the entire map without leaving any gaps to slip through. The two problems with it are: The redundancy is practically non-existent:
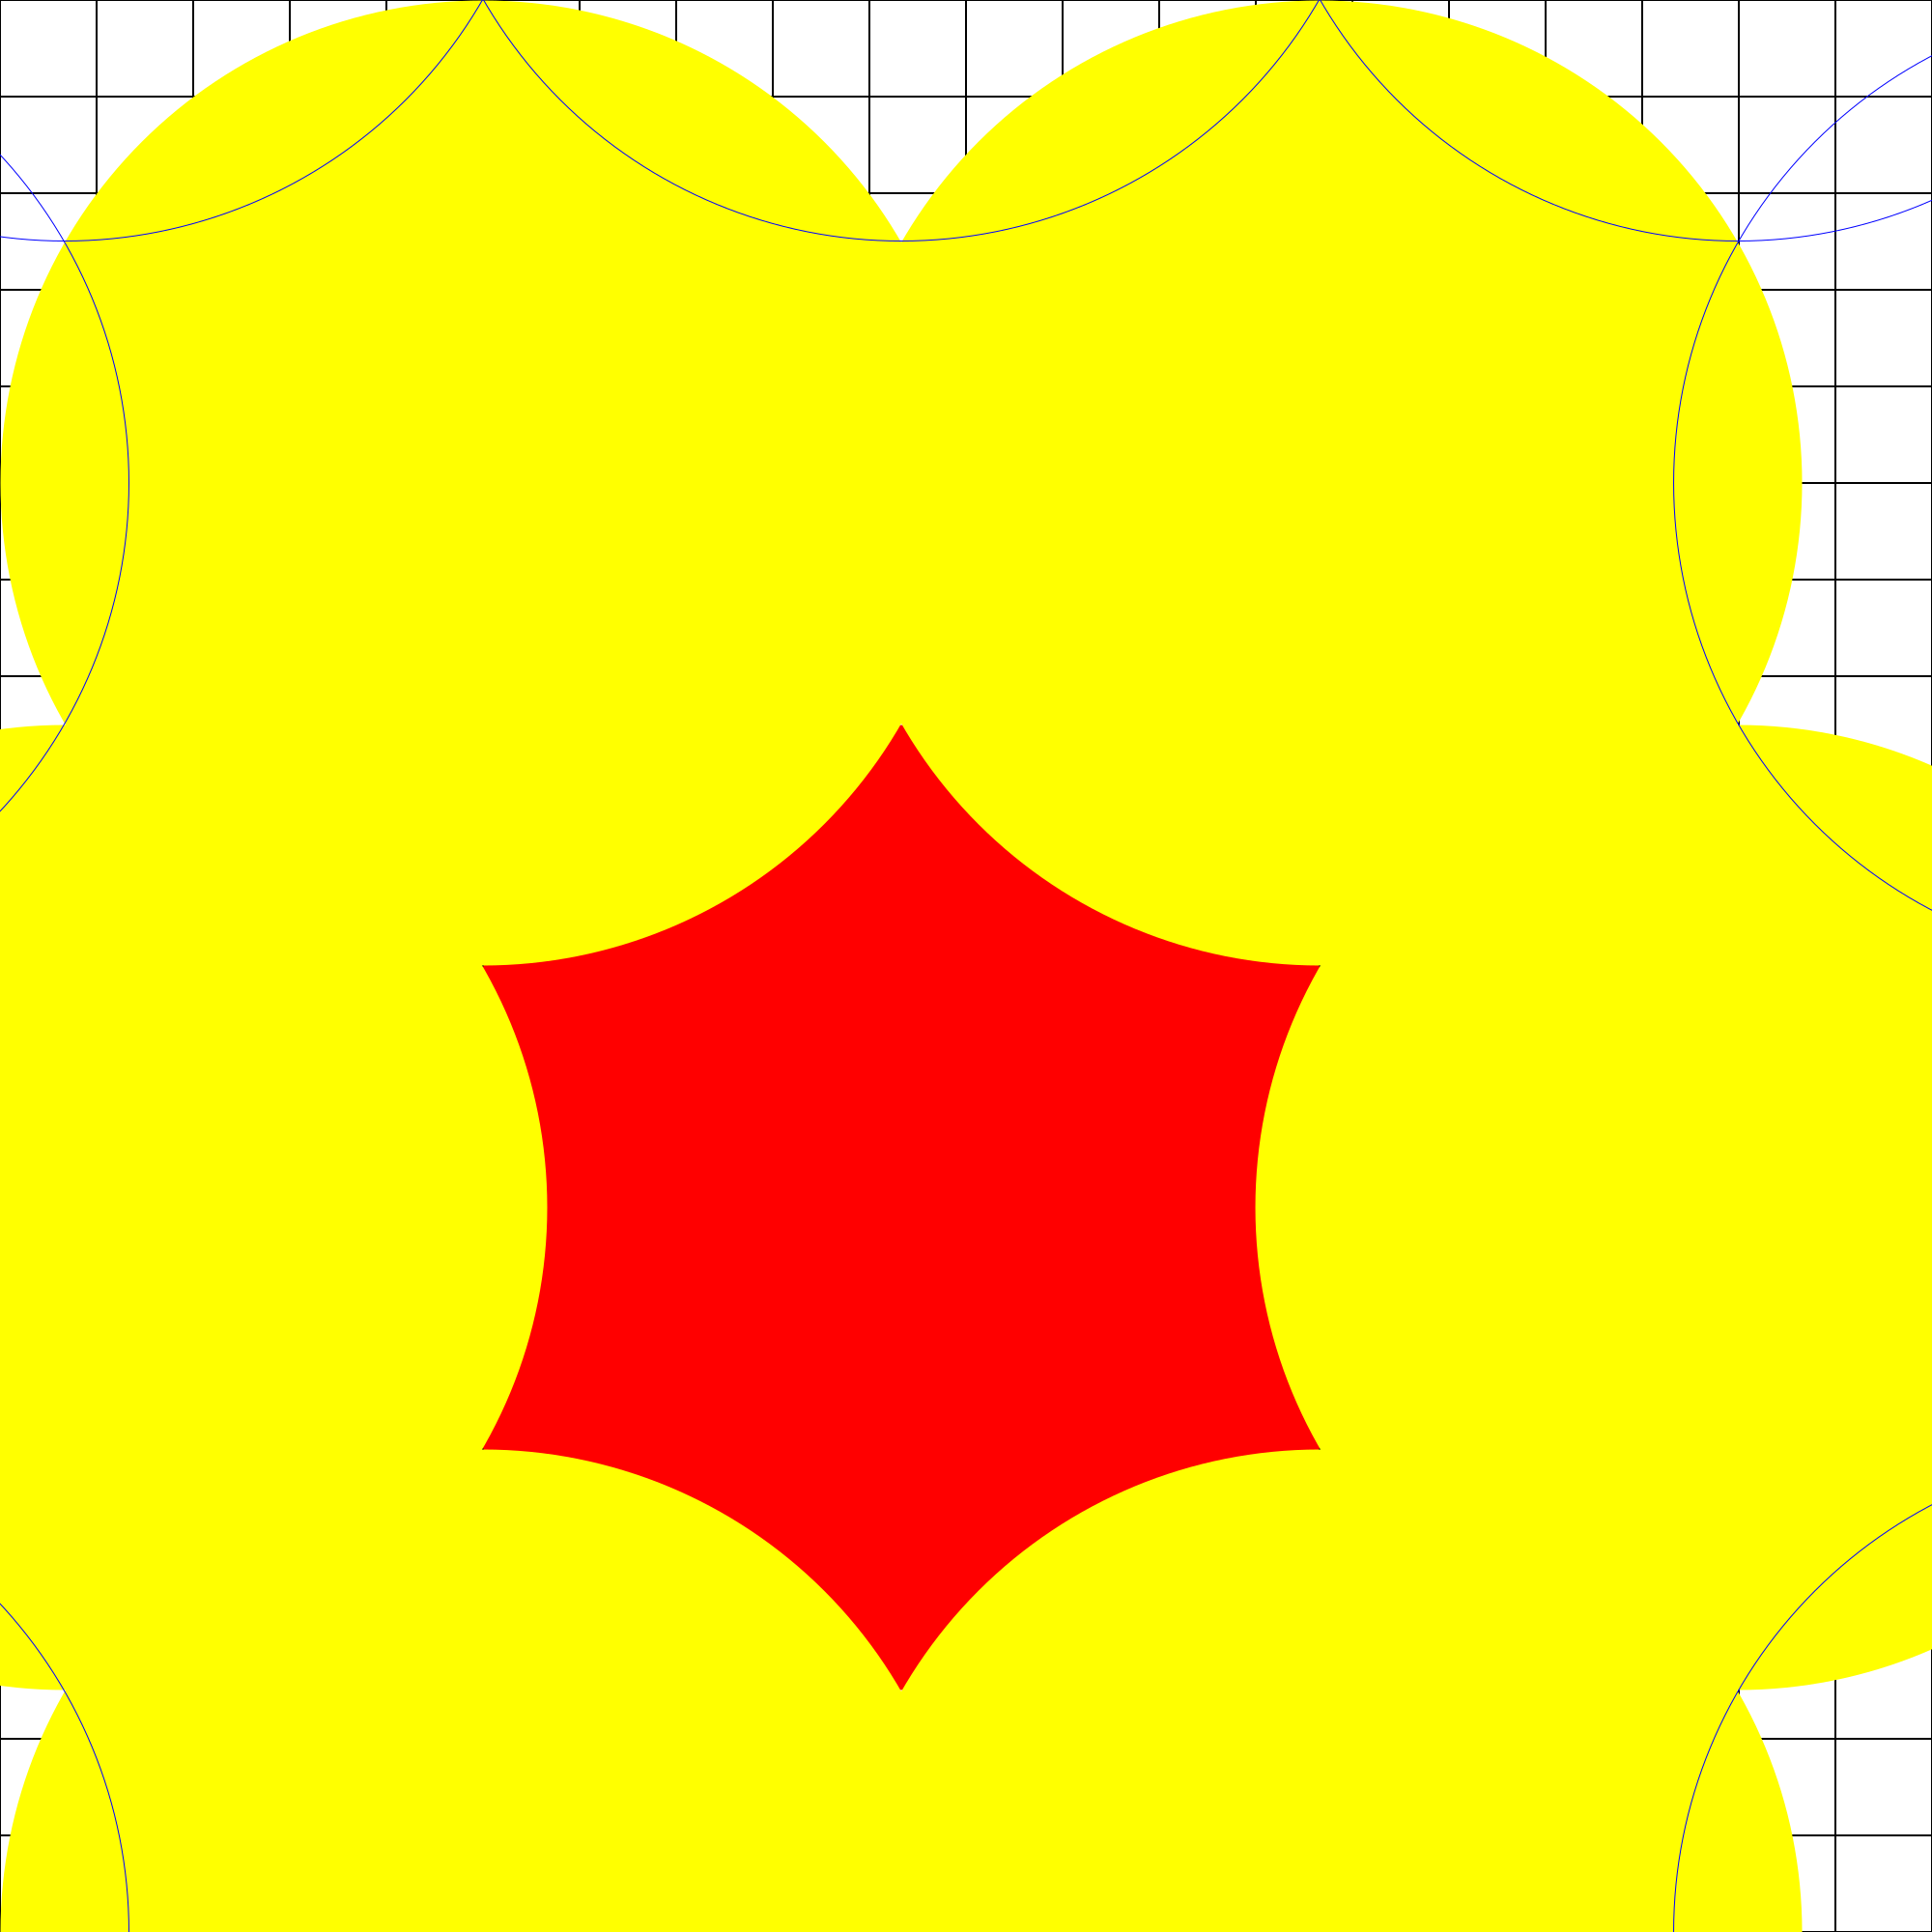
If only one station is missing, the gap of an area of $2.1\times10^6$ is huge. And the pattern to build it is not too easy to memorize: Depending on the starting point in Armada grid tiles it is either 10/0, 15/8.5 and 10/17 or 5/8.5, 0/17 and 20/0. So this pattern is really only a cheap means (in terms of Dilithium and building time) to cover the entire map.