Table of Contents
Star Trek: Voyager – Elite Force Settings
The main menu of EF looks like this:
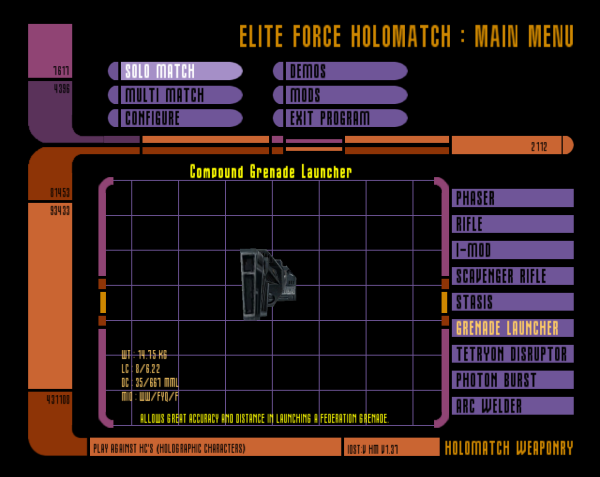
In other languages (German, French) all the menus may be translated, so the texts described here only go for the English version/setting. See also section Game Options to change the language. If you click on Configure, you will end up in the settings menu.
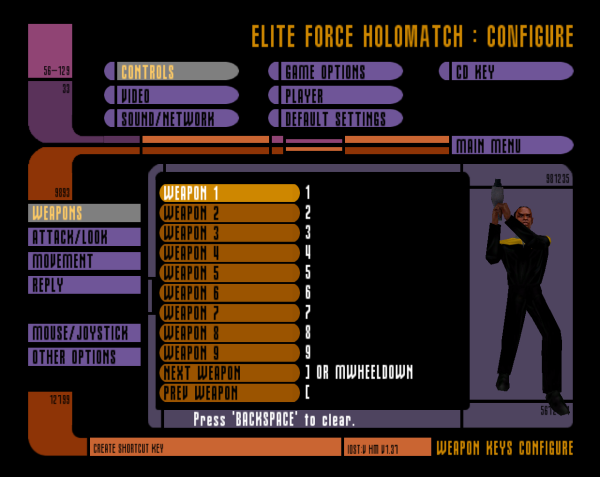
It covers many of the important settings, but not all. Some of them cannot be set via the menus but only via the configuration or setting variables directly via the console.
Controls
The Controls settings are the first menu you are placed in, after clicking on Configure It may require some adjustment. An important feature of a good shooting game is that you can adapt the controls to your own needs, as in EF. You can define which keys on your keyboard trigger which function/setting.
- Weapons: fits quite well from the start
- Attack/Looking around is very important, because here you can set small things like binding Alt Attack on the right mouse button. But this is a matter of taste.
- Reply: It's a way to send chat messages. You should already have one, because the console is unwieldy.
- Mouse/Joystick is quite important for people with a game pad/controller, because you can adjust the sensitivity. But it's rarely used. Most players use the computer keyboard.
- Other options:
- Always running: When on, you need a key held, to walk slower (and silent). If off, it is the exact other way around, you only run when holding a key.
- Autoswitch Weapons: Can be set to off, safe and best. Defines what happens, when you pick up a weapon. If off, nothing happens, if safe, it might switch to it, if it is not a weapon with splash damage (Compound Grenade Launcher and Photon Burst always cause splash damage), while best always selects the weapon with highest damage.
Graphics settings
Clicking on Video in the settings menu, you end up here:
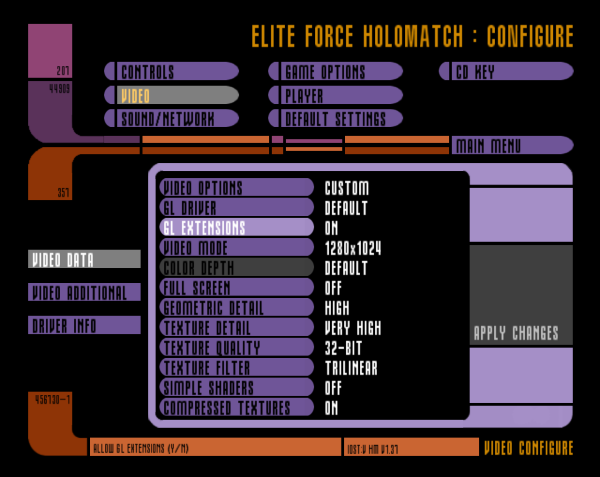
Video Data
This is selected by default, containing the basic settings. The effects of these settings should be known. As on modern hardware you will hardly run into trouble when it comes to performance, it is recommended to max out the settings:
- GL extensions: On
- Video Mode: You will probably not be able to select your native resolution, as the selectable options here are rather limited. See section Use Other Resolutions on the subject.
- Color depth: Use 32 bits here.
- Geometric detail: high
- Texture detail: Very high,
- Texture quality: 32-bit
- Texture Filters: Trilinear
- Simple shaders: Off
- Compressed textures: Well, actually it does not matter. You can trade CPU load for RAM load here (compressed requires more calculation time but less RAM), but today that should not make much of a difference, both is available in abundance.
Video Additional
When clicking on Video additional you get to the following settings:
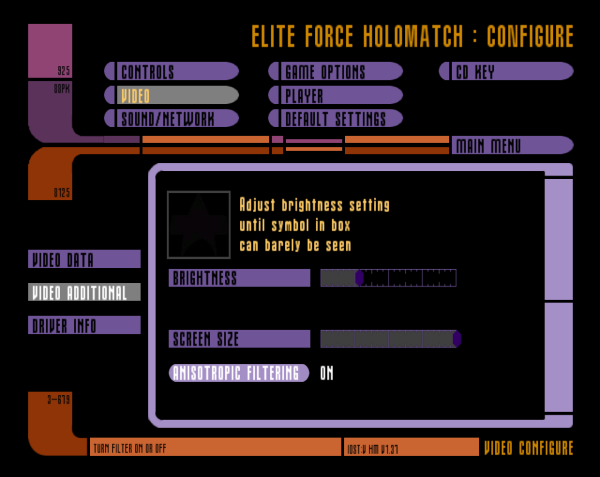
The Brightness setting is important, as some maps are rather dark. If you set it to low, you will not be able to see enough. Then again, if you set it to high, everything will end up looking kind of washed out. You will have to experiment with that a bit. It says, “until symbol in box can barely be seen” but do not take this literally. Usually you want to set it a bit higher, for the above mentioned darker maps.
Anisotropic Filtering: Use it! The effect is, that textures of the ground look better.
Screen size: That's a bit of a technical question, although players tend to never touch this. It limits the amount of area actually used by the game, much like the underscan of old tube monitors. The border is in a greyish color, so the effective screensize is lowered, if you use this setting. On modern flat screen monitors you should not require this setting at all.
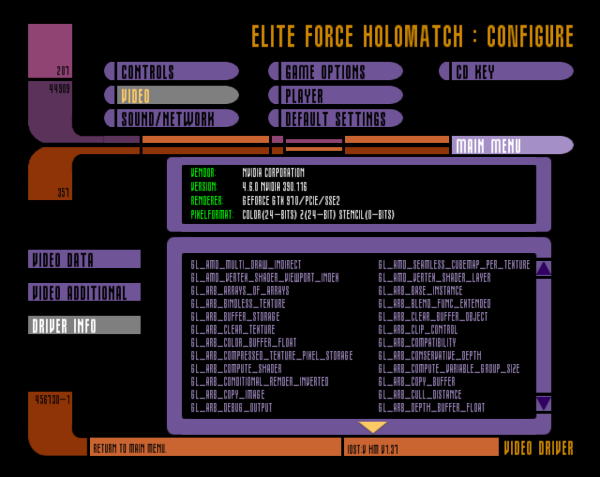
Driver Info
Does what is written in the advertisement: Here you can see some data concerning your graphics card/driver.
Adjust Brightness
EF has its problems with the gamma value under Windows NT systems (thus everything starting from Win2000/XP upward) with the original binaries. This means that the game is usually much too dark, no matter what you have set during installation or with the slider in the menu. This can be changed as follows:
- Open the file efconfig.cfg in the directory baseEF of the EF installation (or in case of newer versions, the location can be seen here),
- search for the line r_ignorehwgamma "X" and set X to
0, - search for the line r_overBrightBits "X" and set X to
0.
Then it is actually too bright. But rather too bright and one can see something than too dark and one can't see anything. The above also applies to the file hmconfig.cfg, which provides the effect for the multiplayer. For ioQuake3 derived versions of EF this setting is not necessary, because the slider does exactly what it is supposed to do.
The Open Broadcaster Software (OBS) is also affected from this bug, even when using Lilium Voyager. This has the following effect: In-game, the brightness looks just fine, while recordings look rather dark. When using the r_ignorehwgamma variable setting, the video looks brighter as well.
The reason for this strange behavior is the following: The original game is asking the hardware to adjust gamma values directly. As hardware gamma affects the entire systems graphics output, all connected screens are affected (brightened up), which usually is not a desired effect. Therefore modern drivers usually refuse to enable such a feature, hence EF keeps being displayed darker than intended, as well.
Use Other Resolutions
By default, EF has a rather limited selection of possible display resolutions available in the menu. This by no means reflect the actual abilities the game has, when it comes to resolutions. EF is based on the Quake 3 Arena engine. So you can use the Q3A Graphics Hack to play EF in HD or with wide screen resolutions. The two relevant config files are efconfig.cfg (for the single player) and hmconfig.cfg (for the multiplayer), see also Location of the Config Files. For mods (e. g. pinball) the config stored in the mod folder may also have to be modified.
Sound and Network Settings
When clicking on Sound/Network, you enter the following sub menu:
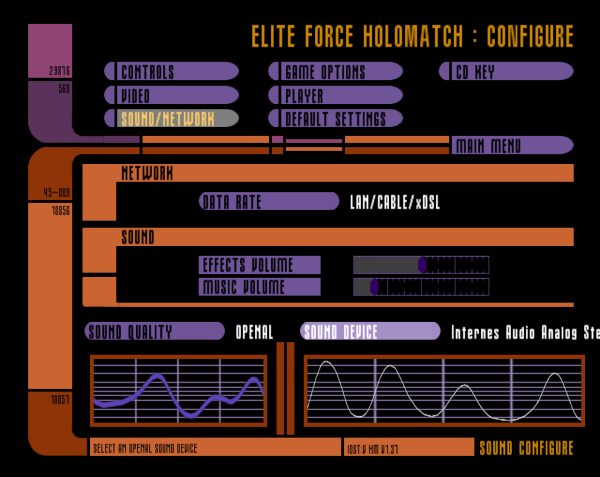
Here you can select the output sound device, the quality of it (Openal is recommended) and the volume of effects (weapons, items, environment) and music.
The network settings can be influenced by the Data rate setting. LAN/Cable/xDSL will probably be the right choice. But actually it is recommended, to set that manually in the configuration. See also Net Settings on the subject.
Game Options
When clicking on Game options in the Configuration menu, you will see this:
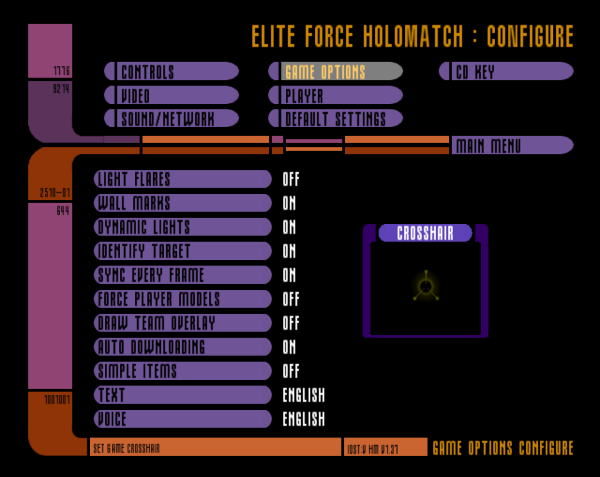
It is a bit of a mystery, why some of this options clearly are graphics settings, but not placed in the graphics configuration menus, but that's just the way it is.
- Light flares: This adds some shining effects on point-shaped light sources.
- Wall marks: Let's you see the impact points of you hits on walls.
- Dynamic lights: The lighting of objects changes, when they move through the game world. Should be turned on.
- Identify target: Is the opponent's name shown when I aim at him, or not?
- Sync every frame: That's the vsync setting. If turned on, you avoid screen tearing, as the frame rate is limited to the refresh rate of your monitor. You want to have this turned one.
- Force player models: If on, all players have the same model you use, on your side. So their models are not displayed, as they set them.
- Draw team overlay: Displays the health and shields of your team mates at the desired location.
- Auto Downloading: Should missing maps, models or mods be automatically downloaded from the server? This can be a problem in either direction. If turned off and the server currently uses a map you do not have, you cannot join the server. If turned on however, it might occur, that downloaded maps, models or mods might interfere with normal operations on another server of in combinations with certain other maps.
- Simple items: Are items like weapons or ammunition 3D objects or just 2D bitmaps? Set this to Off.
- Text: The language used for in-game texts. Can be English, French or German.
- Voice: The voice over sound, can be English or German.
- Crosshair: Opens a selection of available crosshairs.
Player Name, Model and Handicap
A bad habit that also occurs on the net is that players forget to enter their name before playing multiplayer games. This can be very “funny” when 3 players with the name Redshirt are on the same server at once. So it's best to change it immediately, so you won't forget that either. To do this, click on Configure, then Select Player in EF. You end up here:
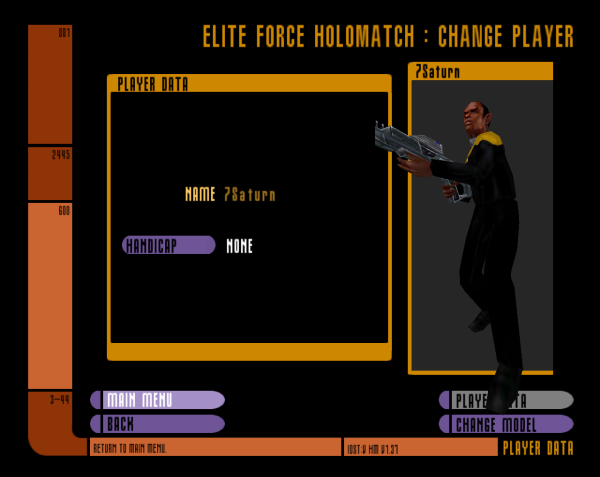
The option Handicap is only interesting for very good players as it reduces the shields, health and weapon damage values to the set percentage value (incl. their upper limits). A handicap of 50 means that you only have 50 health points each time you spawn, not 100 as usual, and a maximum of 100 (slowly dropping back to 50). This has the same effect on the shields. The normal value x the handicap : 100 is always assumed as the basis, that means Emergency Hyposprays also charge only to the handicap value, the Booster Hyposprays, yellow medical bag, as well as shields charge as usual to a value of maximum 200, but this value decreases slowly to the handicap value (unless you have enemy contact, then probably a lot faster… 
Colored Nicknames
You can also use colors in the nick by prefixing it with a ^ with a digit. All following characters will then be displayed in the corresponding color. The color assignment is as follows:
| Code | Color |
|---|---|
| ^0 | Black |
| ^1 | Red |
| ^2 | Green |
| ^3 | Yellow |
| ^4 | Blue |
| ^5 | Cyan |
| ^6 | Pink |
| ^7 | White |
Higher numbers are allowed (8 and 9) but are used as modulo 8, so begin at Black again, when using 8. This also works for other elements, such as map names or server names. Why these colors? They are the 8 ANSI colors used on terminals and in C programs. See also: https://en.wikipedia.org/wiki/ANSI_escape_code#3-bit_and_4-bit. The closest resemblance would be the xterm color palette for the first 8 colors.
Overlong Nicks
By default, the length of the nick in EF is limited by the input field. But if you edit the hmconfig.cfg manually (line with seta name "..."), longer nicks are also possible.
Default Settings and CD Key
The menu item Default settings does what it says: When using this button, the game will ask you for confirmation in resetting the settings of the entire game.
The CD key option let's you enter the screen, where you can change or set the CD key. During installation you usually were asked for it already. Some installers do not ask for it, and the user can skip entering this. So if by any chance you do not have a CD key set, you can enter it here. It also shows you, if there is already a CD key in place.
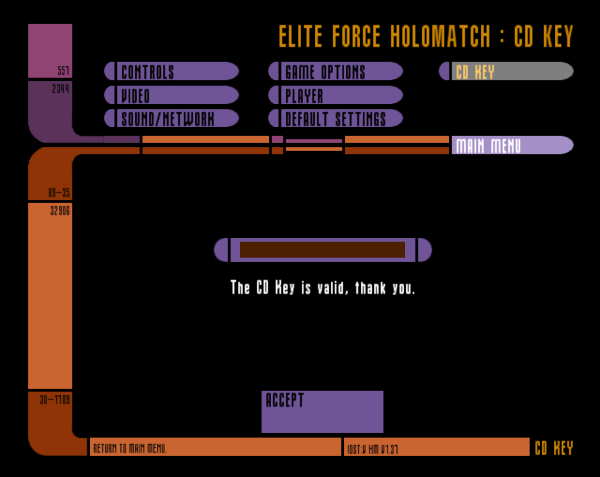
See also Problems with CD Keys on this matter.
[ Back to Star Trek: Voyager - Elite Force ] [ Back to the games database ]
